In plastic injection molding, undercut injection molding stands out as one of the most demanding yet rewarding aspects of the injection molding process.
Features like hook style mechanisms, locking tabs, screw threads, side holes, interlocking features, and secure connections often require undercuts to achieve complex shapes, intricate geometries, multiple features, and true one-piece functionality in injection molded parts.
These elements eliminate secondary operations, reduce product assembly steps, and create cost effective molded parts for consumer electronics, automotive, medical, and other high-value industries.
However, every undercut adds complexity to mold design, increases cost, extends cycle time, and demands careful management of material flow, part geometry, production volume, and ejection mechanics.
This comprehensive guide equips designers and engineers with the practical knowledge to master undercut injection molding — minimizing risks while maximizing part performance.
Understanding Undercuts and Their Impact on the Molding Process
Undercuts are any features in a molded part that prevent straight-pull ejection from the mold.
When the mold closes and molten plastic fills the mold cavity, an undercut creates geometry that physically interferes with the opening direction of the core or cavity.
Without these features, we could not create the locking tabs or hook style mechanisms found in everything from medical devices to product assembly kits.
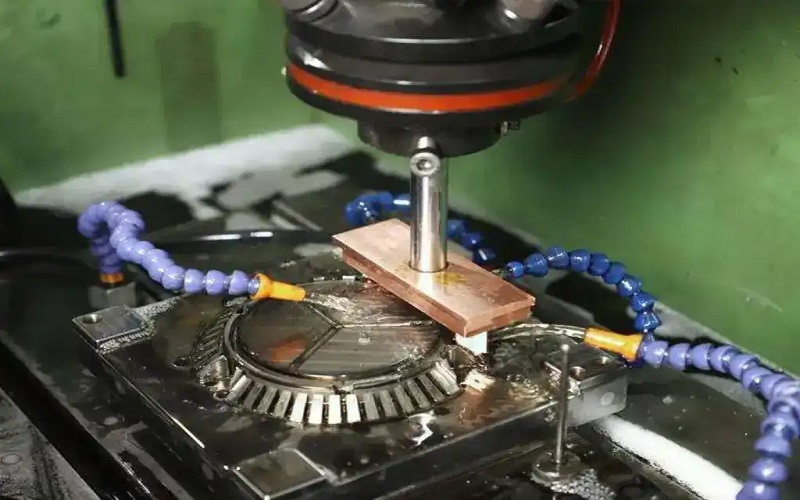
However, this complexity is not free; it fundamentally alters the manufacturing process, requiring more maintenance and higher precision in the milling machine phase of tool construction.
Specifically, undercuts can complicate and increase the cost of injection molding due to the need for additional mechanisms like sliders, lifters, or hand-loaded inserts.
Identifying External and Internal Undercuts
The first step in undercut design is identifying where the obstruction lies.
External undercuts are protrusions or hooks on the outside of a part. These are typically managed by side actions or action slides that pull away from the molded product before the mold opens.
They are common in parts requiring side holes or external latches.
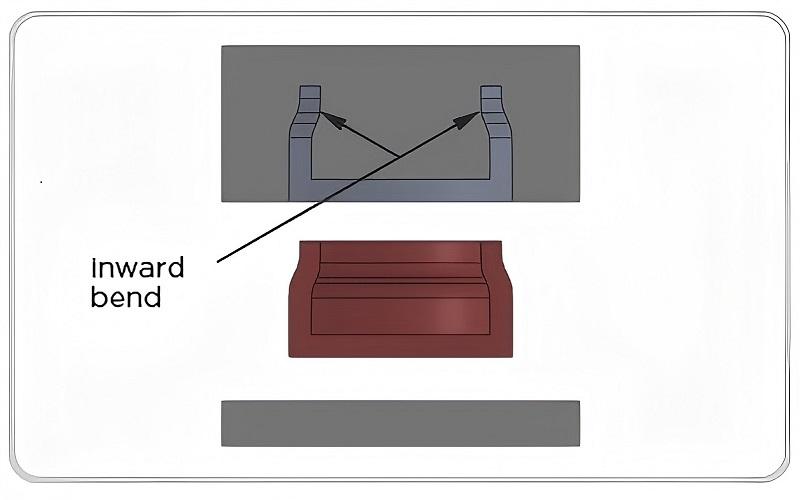
Conversely, internal undercuts are recesses inside the part, such as screw threads or snap-fit slots.
These are significantly more difficult to release because the mechanism must collapse or move inward within the cavity.
Specifically, undercuts complicate mold design, demolding, and part production due to their intricate geometries.
Failing to plan for these internal features usually results in a part that is physically locked onto the mold core.
The Critical Role of Draft Angles
No matter how complex the undercut, draft angles should be incorporated into part designs to ensure easy ejection from the mold.
Draft reduces the friction between the plastic material and the steel.
In fact, sufficient draft angles must be present even on the undercut features themselves to facilitate the movement of side actions.
Without sufficient draft, the mechanical force required to eject the part can cause “drag marks” or even structural failure of the molded parts.
Design-First Strategies to Minimize or Eliminate Undercuts
Strategic Design Approaches to Handle Undercuts
Because of the added complexity, the best solution is often to minimize undercuts during the initial part design phase.
It is often best to avoid using undercuts in injection molding whenever possible.
However, if the feature is non-negotiable, engineers must look at the mold’s parting line as their primary tool for simplification.
By strategically re-evaluating the part’s orientation within the mold, a designer can often turn a “hard” undercut into a “simple” feature.
Specifically, designers generally try to minimize undercuts as much as possible to avoid complications in the molding process.
This proactive approach involves looking for a simple solution where a change in parting line placement eliminates the need for moving parts, thereby reducing the overall production volume risk and cost.
Adjusting the Parting Line
Moving the mold’s parting line to intersect with an undercut is sometimes the easiest solution for part release.
The parting line is where the two halves of the mold separate.
Furthermore, the parting line can be adjusted to intersect with undercuts to facilitate part ejection.
By “splitting” the undercut across one half and the other, you allow the part to be freed by the natural opening of the press.
This is a highly cost effective way to handle complex shapes without adding mechanical side actions.

Utilizing Telescoping Shutoffs
When a part requires a hole or a clip, telescoping shutoffs can simplify mold design by shutting off certain part features during the molding process.
Instead of a moving slider, the mold uses two stationary pieces of steel that touch (shut off) each other.
Specifically, telescoping shutoffs extend from one side of the mold to the other to create clip- and hook-style mechanisms.
This creates a “pass-through” in the plastic, allowing the undercut to be formed without any moving components, which keeps the cycle time low.
Key Mold Mechanisms to Successfully Mold Undercuts
When part design has been optimized to the best of its ability (adjusting parting line placement, adding sufficient draft angles, and standardizing wall thickness), but undercuts are still unavoidable, the “auxiliary actions” of the mold are necessary to solve the problem.
Don’t worry, although these mechanisms sound complex, the principle is actually quite simple: the undercut feature is formed during mold closing, and before or during mold opening, it is “cleared” or “deformed” to release it, allowing the molded parts to eject smoothly.
Below, are listed the most common solutions, sorted from highest to lowest frequency of use:
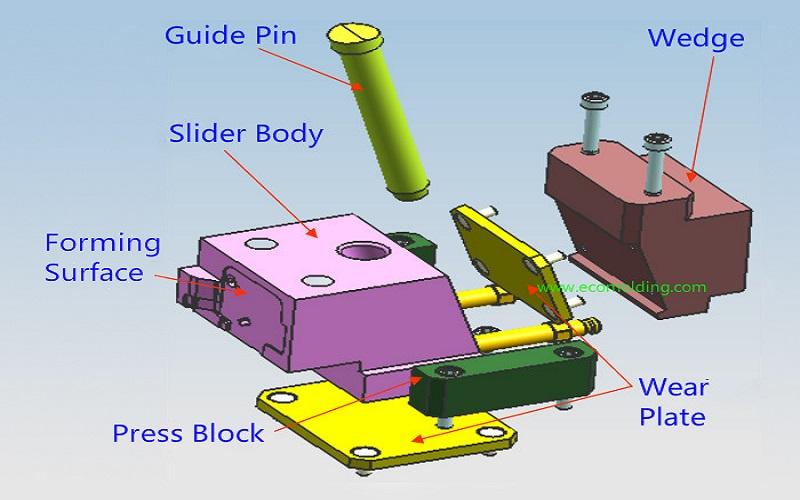
Side Actions / Action Slides – The Go-To for External Features
Side actions are used to create undercuts by allowing certain features to be formed during the molding process.
Side actions are used to create undercuts by inserting themselves into the mold from the side as it closes.
How it works: When the mold closes, an angled pin pushes the slide in from the side to form hook style mechanisms, locking tabs, side holes, or external clips. On opening, the slide retracts first, freeing the undercut so the part ejects straight.
Best for: Medium to high production volume, external undercuts.
Trade-off: Adds 15–30% to tooling cost, slightly longer cycle time, more maintenance.
Lifters & Angled Pins – For Internal Undercuts
Lifters are internal mechanisms that pull inwards to release internal features.
How it works: A lifter (often driven by an angled pin) moves up and inward during ejection, releasing internal undercuts (like snap-fit slots or hooks inside deep cavities) before fully pushing the part out.
Best for: Internal undercuts, tight spaces, deep ribs.
One-liner: Need a hook or slot inside the part? Lifters pull it free cleanly.
Bump-Offs – The Simplest & Cheapest Option
Bump-offs can be used to allow parts to deform slightly during ejection, facilitating the release of undercuts.
How it works: Design a small ramp on the undercut so the plastic flexes just enough to “bump off” during ejection, then snaps back to shape.
Best for: Flexible materials (TPE, TPU, soft PP), shallow undercuts (usually 1–2 mm deep).
Hand Loaded Inserts – Perfect for Low Volume & Prototypes
Hand-loaded inserts can be used to prevent plastic from flowing into certain areas of a mold, allowing for undercuts.
How it works: The operator manually places a metal insert into the mold cavity before each shot. After molding, the insert comes out with the part and is removed by hand for reuse.
Best for: Low production volume, prototypes, very complex or changing undercut layouts.
Unscrewing Mechanisms & Collapsible Cores – Thread Specialists
Unscrewing mechanisms rotate threaded cores out before ejection for clean screw threads and threaded parts.
Collapsible cores collapse inward to release complex internal undercuts before ejection.
One-liner: Bottle caps, knobs, or precision internal threads? These deliver flash-free results.
Telescoping Shutoffs – Smart Way to Create Holes & Clips
Telescoping shutoffs can simplify mold design by shutting off certain part features during the molding process.
How it works: A core extends from one side of the mold to shut off against the opposite side, creating clean holes, slots, or create clip features without full slides.
One-liner: Need a through-hole or clip without big slides? Telescoping shutoffs keep it simple.
Material Selection – Critical for Ejection Success
The material you choose is a major factor in how undercuts behave. Rigid materials pose more challenges during ejection than flexible or elastic materials.
If the part is made of flexible materials, you might be able to use a “bump-off.”
Material selection is crucial for parts with undercuts, as flexible materials can facilitate easier ejection.
Optimizing the process for these materials requires a delicate balance of temperature and timing to ensure the finished part returns to its original shape after being “bumped” out.
Specifically, material and design optimization in undercut molding can prevent defects like sink marks or warping.
Designing for Bump-Offs
Bump-offs can be used to allow parts to deform slightly during ejection, facilitating the release of undercuts.
In this process, the plastic is literally stretched over a small undercut as it is pushed out of the mold cavity.
Specifically, bump-offs allow a part to deform just enough to exit the mold without damage during ejection.
This is common for container lids where the undercut is shallow and the material is resilient.
Hand-Loaded Inserts
For low production volume or complex prototypes, hand-loaded inserts can be used to prevent plastic from flowing into certain areas of a mold.
Hand-loaded inserts are machined components placed into a mold by hand before the part is injection molded.
While this increases the labor per finished part, it drastically reduces the initial cost of the mold because it avoids expensive automatic side actions.
Conclusion
Mastering undercut injection molding allows for the creation of one-piece, complex assemblies that would otherwise require multiple parts.
Commonly, undercuts appear in complex designs like consumer electronics housings (with locking tabs), automotive clips, bottle caps with screw threads, and medical connectors needing secure connections.
While undercuts can increase tooling costs by 15-30% — particularly when coring thick sections or adding side actions — they deliver secure connections, sealing mechanisms, and premium aesthetics.
By applying sufficient draft angles, side actions, smart parting line placement, and considering other factors such as material and production volume, designers can achieve complex shapes without disrupting the manufacturing process in most injection molding projects.
The key to success is knowing when to simplify the part design to remove unnecessary undercuts and when to invest in the added complexity that undercuts provide for better function and performance.