To create high-quality parts using injection molding, you need to understand the key design principles that ensure efficient production and minimize defects, especially when designing for injection molding.
This guide covers crucial aspects such as selecting materials, maintaining proper wall thickness, using draft angles, and more.
By mastering these elements, you can optimize your designs for successful injection molding.
Understanding the Injection Molding Process
The journey of creating a plastic part through plastic injection molding is both intricate and fascinating.
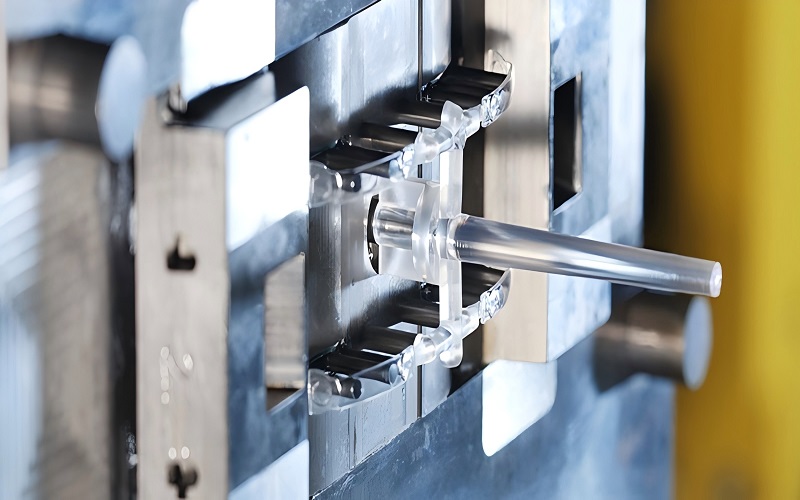
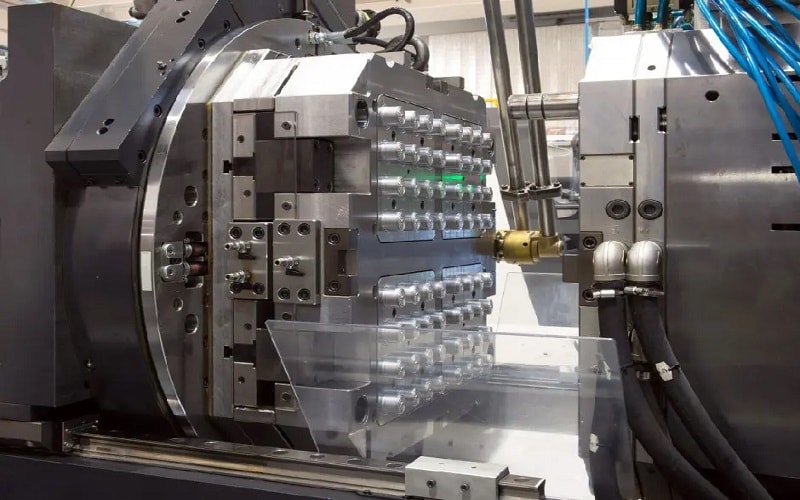
The process starts with the clamping phase, where the molding machine securely closes the two halves of the mold, preventing molten plastic from escaping during injection using an injection molding press.
This method is essential for producing high-quality plastic parts.
The process of injecting molten plastic into a mold involves the following steps:
- Granular plastic resin is fed by gravity into a heated barrel, starting with the material dropping from a hopper.
- The resin is melted by the heat and mechanical action of a screw-type plunger, creating a flow of molten plastic.
- This molten plastic is then injected into the mold cavity through a nozzle, filling the shape of the desired part.
After filling the mold building, the dwelling phase begins, holding the plastic under pressure to ensure it fills all the mold’s intricacies and details. Following this, the cooling process starts, where the plastic solidifies within the mold, taking on its final shape.
After sufficient cooling, the mold maker opens and the finished part is ejected.
Each step in this manufacturing process is meticulously designed to ensure the production of high-quality parts with minimal defects, demonstrating the intricate dance between material science and engineering precision.
Material Selection for Injection Molding
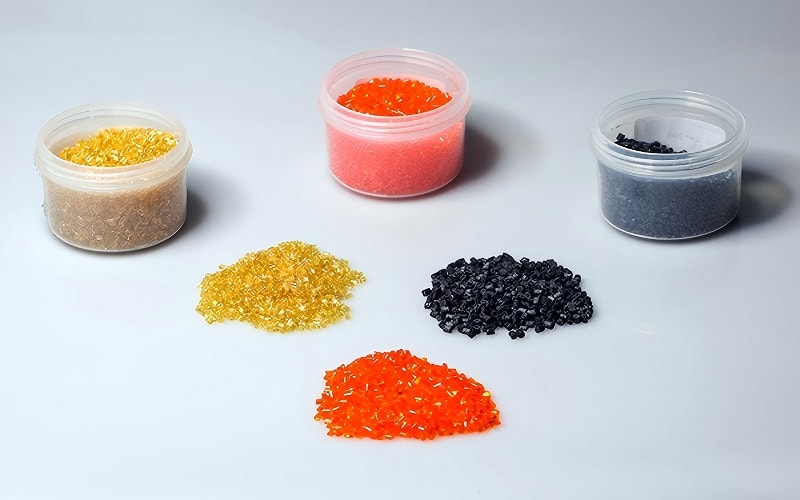
Selecting the right material for injection molding materials is paramount to the success of your project. The two main categories of plastic material used are thermoplastic resins and thermosets.
Thermoplastics, comprising about 85% of materials processed annually, can be remolded and reprocessed, offering versatility and ease of use. They soften with heat, suiting various applications.
Thermosets, on the other hand, cannot be remolded after curing, but they offer high strength and temperature resistance, making them ideal for demanding applications. Choosing between these materials depends on your project’s specific requirements, including strength, flexibility, and processing behavior considerations.
Fillers and additives can enhance your material’s properties, providing UV protection, improved lubricity, or antimicrobial characteristics, making the final product suitable for varied applications. Additionally, common grades of the same plastic may include variations like glass fibers or carbon fibers to enhance physical characteristics.
Consulting with an experienced injection molder can be invaluable, as they can leverage their supplier network to help select materials that best meet your design for injection molding needs.
Understanding the properties and processing requirements of different plastics allows for informed choices, ensuring your injection molding project’s success.
Importance of Wall Thickness
Wall thickness plays a pivotal role in the injection molding process, influencing the quality and functionality of the final part.
Maintaining a uniform wall thickness is crucial as it promotes consistent cooling, prevents pressure spikes, and minimizes defects such as sink marks and warping.
Inconsistent wall thickness can lead to various issues during the cooling process. Areas with thicker walls cool more slowly than thinner sections, leading to differential shrinkage and potential defects like warping and cracking.
Therefore, it is essential to keep proper wall thickness within the recommended ranges for specific materials to ensure effective molding and part integrity.
A consistent wall thickness not only enhances the part’s structural integrity of the molded part but also improves the efficiency of the production process. Minimizing thickness variations improves material flow and reduces defects, resulting in higher quality and more reliable parts with thinner walls.
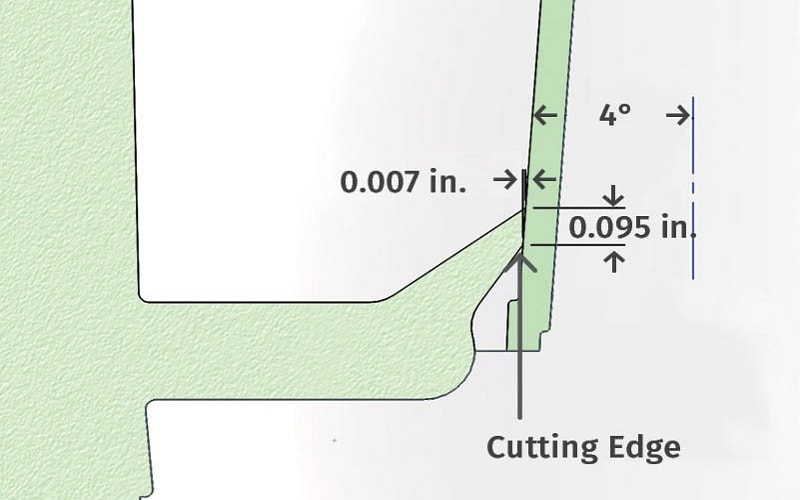
Incorporating Draft Angles
Draft angles are a critical consideration in injection mold design, facilitating the smooth ejection of parts from the mold.
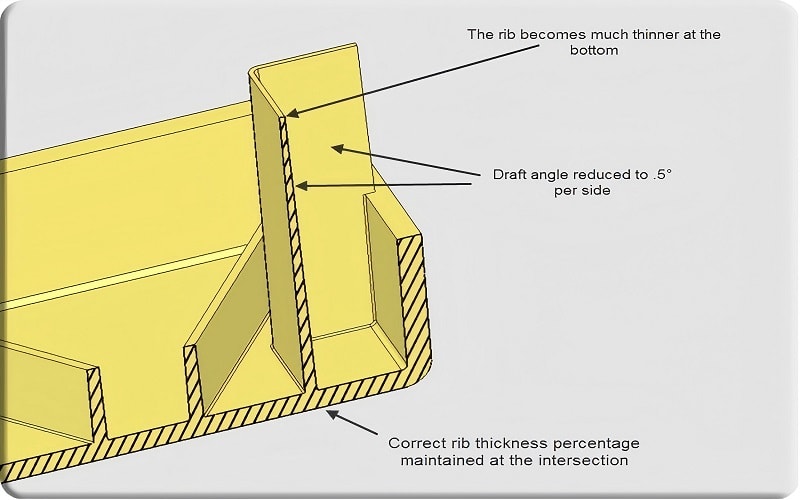
Applying at least a 0.5-degree draft angle based on all vertical faces can significantly improve the ejection process and reduce tool wear.
For textured surfaces, the draft angle needs to be adjusted accordingly:
- Light textures require a minimum of 3 degrees.
- Heavier textures necessitate around 5 degrees to ensure the parts can be easily ejected without damaging the mold or the molded part.
- Ribs should have a draft angle of approximately 0.5-1.5 degrees to facilitate mold release.
Including draft angles early in the design process prevents costly redesigns later.
Ignoring design considerations in early prototypes can lead to significant issues when transitioning to injection molding, potentially increasing production costs and time.
Designing with Ribs and Bosses
Ribs and bosses are indispensable features in injection molded parts, adding structural integrity without necessitating thicker walls. Key points for effective rib design include:
- Ribs enhance the strength of tall walls while adhering to standard wall thickness guidelines.
- Ribs should typically be 50-60% of the wall thickness to maintain material strength and performance without causing defects.
- Ending rib designs at a rounded bottom helps maintain smooth plastic flow and reduces stress concentrations.
Bosses, which serve as vertical walls features, support assembly and enhance the structural integrity of the parts.
They should maintain a thickness of 40-60% of the base wall thickness to provide adequate support without introducing weaknesses.
Properly designed ribs and bosses can significantly improve the performance and durability of injection molded parts.
Optimizing Gate Design for Efficient Injection Molding
Gate Design and Location
Gate design and gate location are pivotal in controlling the flow of molten plastic into the mold cavity, directly affecting the quality and performance of the molded parts.
Common gate types include tunnel gates, direct sprue gates, submarine gates, diaphragm gates, hot runner systems, and edge gates. Each offers unique advantages depending on the application.
Selecting the appropriate gate type and location can optimize material flow, reduce cycle times, and minimize defects in the final product.
Proper gate design ensures that the molten plastic fills the mold efficiently, producing high-quality injection molded parts with minimal waste.
gate type
Selecting the appropriate gate type is crucial for achieving high-quality injection molded parts.
Hot tip gates are ideal for high-volume production, as they allow precise control of molten plastic flow and minimize excess material, reducing waste when the mold closes.
Sub gates, which feed material below the parting line, are excellent for small, intricate parts, as they can be automatically sheared off during ejection, eliminating the need for manually trimmed gates.
Effective gate design ensures uniform flow of molten plastic, helping to eliminate cosmetic defects like weld lines or surface marks.
Use smooth transitions in gate placement to maintain dimensional stability and avoid stress in parts. For parts requiring good chemical resistance, pair gate design with compatible materials.
High-precision CNC machining for molds supports accurate gate placement and complex geometries, ensuring consistent, high-quality parts with minimal waste.
Avoiding Sink Marks
Sink marks are a common defect in injection molded parts, often caused by thick wall sections cooling at different rates than thinner areas. One effective strategy to avoid sink marks is to core out solid sections, which:
- Reduces the overall thickness
- Minimizes sink marks
- Improves material flow
- Reduces the part’s weight
- Helps to prevent sink mark issues
Incorporating ribs and coring features can further reduce thick sections in the design. Ribs should be designed slightly smaller to reduce the wall section at connection points, minimizing the potential for sink marks. Ideally, these features should be placed on the a and b sides of the part to avoid visible defects.
For bosses, reducing the bottom wall thickness to 0.7-0.9 times the nominal wall thickness can help minimize sink marks.
Additionally, support ribs should not exceed 60% of the nominal wall thicknesses to prevent sink marks from forming on the opposite side of the part.
Filleting sharp corners can also help prevent air entrapment during the injection process, improving material flow and reducing defects. Following these design tips significantly reduces sink marks and enhances the overall quality of your injection molded parts.
Adding Radii and Fillets
Adding radii and fillets to your part design can significantly improve the durability and aesthetics of injection molded parts. The benefits include:
- Rounded corners limit stress concentrations and minimize shrinkage differences, leading to more robust and reliable products.
- Radii enhance the visual appeal of the parts.
- Radii improve plastic flow during the molding process, reducing the risk of fractures.
Fillets can also help control tooling costs, making the production process more efficient.
Sharp corners increase production costs by causing weaknesses in parts and leading to stress points.
Maintaining uniform wall thickness when designing with radii ensures consistent material flow and optimal performance of the final product.
Surface Texturing
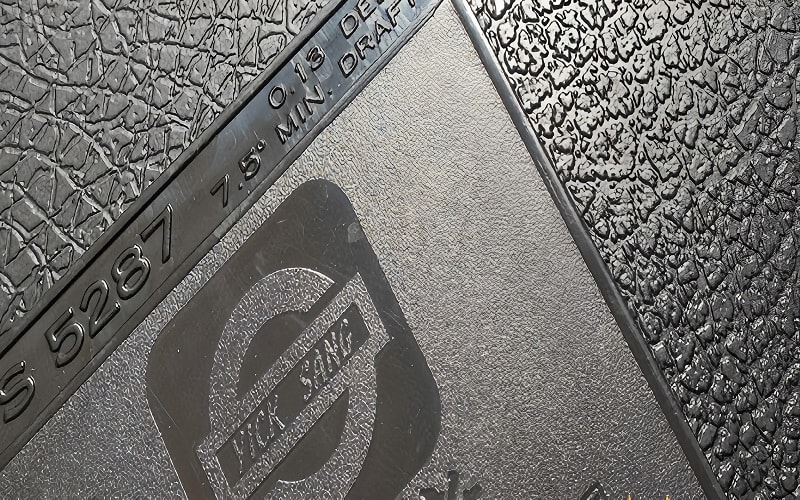
Surface texturing plays a crucial role in both the visual appeal and functionality of molded parts.
Textured surfaces can effectively conceal flow lines and defects, enhancing the cosmetic appearance of the product.
The choice of texture also influences the grip and safety of the part’s surface during use.
Different surface textures can alter the adhesion properties of molded parts, making them suitable for various applications.
The appropriate texture depends on the desired aesthetics and functionality of the final product, with mold surface textures classified into categories such as:
- Shiny
- Semi-gloss
- Matte
- Textured finishes.
Texturing in injection molding design serves several purposes:
- Applies patterns for appearance
- Improves grip
- Camouflages imperfections
- Reduces wear resistance
Considering draft in part design is essential when using aggressive textures to avoid drag marks during ejection.
Ejector Pins Placement
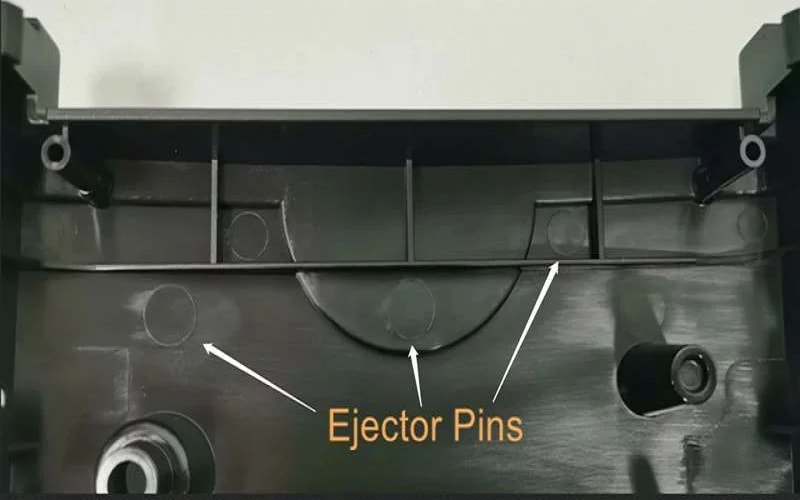
Ejector pins are essential for ejecting parts from the mold after cooling. Typically located in the B-side mold half, these pins apply force to push the parts out once the mold opens.
Proper placement of ejector pins is crucial to avoid cosmetic defects on the finished product and ensure effective part ejection.
Key recommendations for using ejector pins include:
- Place ejector pins on non-visible surfaces.
- Use round ejector pins commonly.
- Ensure the design of ejector pins matches the surface they contact to effectively eject the part.
- Address potential issues like mold sticking during the mold process to ensure smooth ejection without leaving marks on the finished parts.
Reviewing Tolerances
Defining tolerances for injection molded parts is essential to ensure correct and consistent dimensions for assembly.
Maintaining proper dimensions and tight tolerances is crucial for the performance of injection molded parts.
Typical tolerances for injection molding range from +/-0.1mm to a very tight +/-0.025mm.
Resin type and specific part features affect dimensional tolerances. At the design stage, consider the following:
- Contact your supplier to discuss tolerance standards.
- Ensure that the tolerances of sample parts align with specified tolerances.
- If adjustments are needed for sample parts, submit an engineering change order.
Summary
Mastering the intricacies of injection molding design can significantly impact the quality, efficiency, and cost-effectiveness of your projects.
From understanding the injection molding process and selecting the right materials to focusing on critical aspects like wall thickness, draft angles, and surface texturing, each step plays a crucial role.
By following these practical tips and leveraging industry expertise, you can achieve optimal results in your injection molding endeavors, creating high-quality, reliable, and aesthetically pleasing parts.