To learn how to create plastic molds, you need to select a suitable mold material, gather the necessary tools, design your mold, and execute the molding process. This guide will provide a clear, step-by-step approach to help you successfully create plastic molds.
Understanding casting techniques and the use of materials like plaster in mold making is crucial for achieving accurate and durable results.
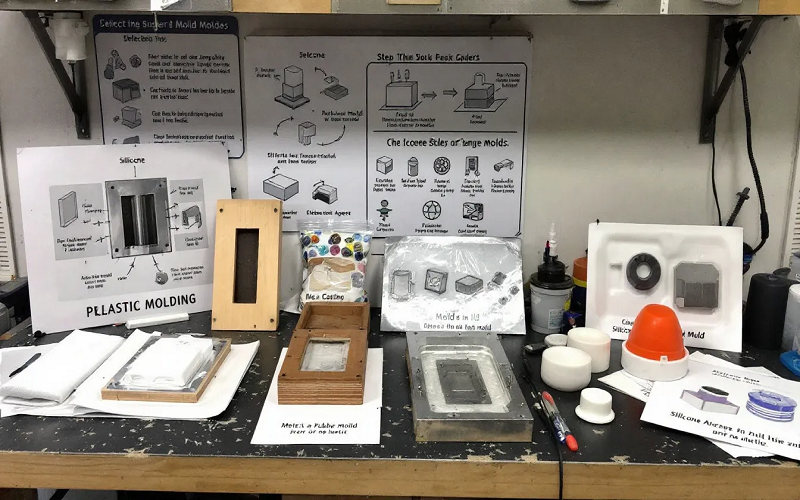
Introduction to Mold Making
Mold making is a fundamental process in the production of plastic products, involving the creation of a mold or form that shapes the plastic into the desired design. The choice of mold material is crucial, with common options including silicone, urethane resin, and polyurethane resin. Each material offers unique benefits, making them suitable for different applications.
Injection molding is a widely-used method for producing plastic products, and it requires a custom mold to be created. This process involves several steps, starting with designing the mold, selecting the appropriate mold material, and then creating the mold using various techniques. One key advantage of mold making is its ability to produce complex shapes and intricate designs that would be challenging or impossible to achieve through other methods.
Whether you’re working on a small DIY project or a large-scale production, understanding the mold-making process is essential. It allows for the creation of high-quality, custom plastic parts that meet specific requirements and standards.
Choosing the Right Mold Material
Choosing the right mold material is a critical first step in the mold-making process. The material you select will impact the durability, cost, and quality of your final product. For many DIY enthusiasts, a silicone mold is an excellent choice due to its cost-effectiveness and ease of use.
Silicone molds can be crafted quickly and are significantly more affordable compared to metal molds. Additionally, silicone offers excellent flexibility, allowing for complex designs with undercuts that would be challenging to achieve with other materials. Clay can also be used to create custom molds for various projects by embedding a master object in molding clay to ensure accurate reproduction of shapes.
Urethane casting, often using polyurethane resin, is another popular option, especially for low-volume production. It allows for high-quality parts to be produced rapidly, with tolerances typically around +/- .020 inches per inch. Polyurethane resin materials can also provide mechanical properties comparable to rigid plastics and rubber-like elastomers, making them a versatile choice for various applications. During the casting process, careful management of excess resin is necessary to ensure clean and precise parts.
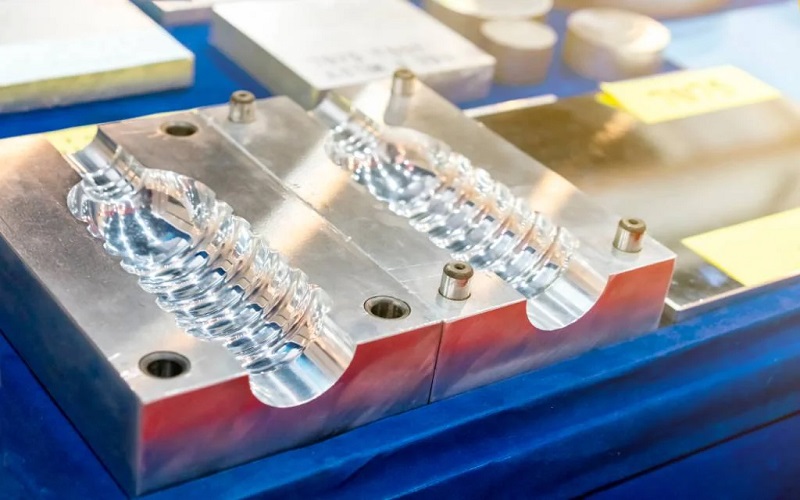
For those looking for maximum durability, durable metal molds, particularly those made from steel, are the way to go. Although they are more expensive than aluminum molds, steel molds offer a longer lifespan, making them ideal for high-volume production using techniques like injection moulding. However, the initial investment and complexity of working with metal may not be suitable for all DIY enthusiasts.
Ultimately, the choice of mold material will depend on your specific needs, budget, and the complexity of your project.
Essential Tools and Equipment
Before you start making your own parts, it’s essential to gather the right tools and equipment. Having the proper setup will ensure a smooth mold-making process and help you achieve the best results. One of the most critical pieces of equipment is the bell jar, used in conjunction with vacuum pumps to create a controlled environment for molding with materials like urethane resin. This helps maintain the integrity of the process by removing air bubbles and ensuring a consistent final product.
Safety gear is also paramount. Goggles and heat-resistant gloves are necessary to protect yourself from potential hazards during the molding process. Additionally, release agents, such as silicone sprays or wax, are crucial for facilitating the easy removal of molded plastic from the mold.
Setting up a dedicated work space is highly recommended. This area should be well-organized and equipped with all the necessary tools, including a mixing container, stirring sticks, and measuring cups. Ensuring that your work space is clean and free of dust will help produce high-quality molds and final products. A good mix of tools will enhance your efficiency. Using a box to contain casting materials can prevent spills and keep your work area tidy.
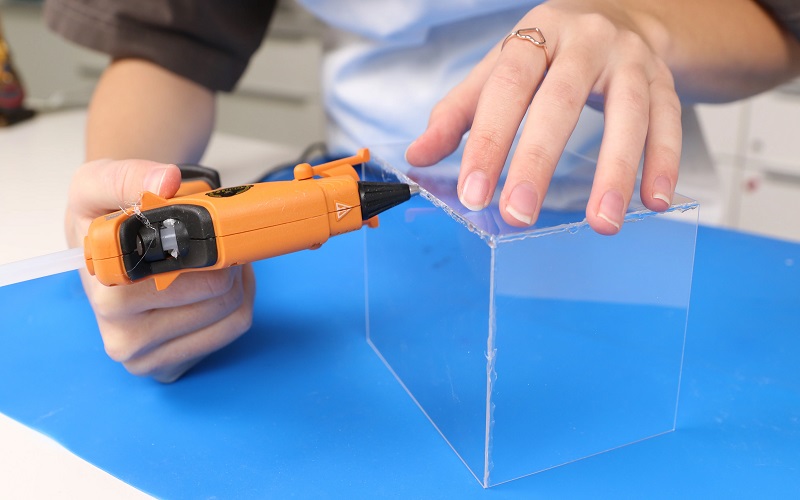
With the right tools and a well-prepared work space, you’ll be ready to dive into the exciting world of wood mold making, where beautiful creations are formed with glue.
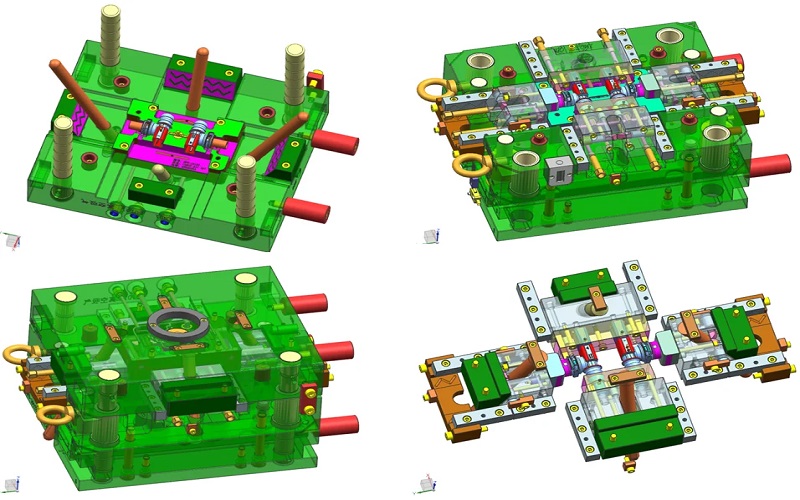
Designing Your Mold
Designing your mold is a crucial step that requires careful consideration of various factors. The mold type, shape, and size should be tailored to the specific part you want to create, particularly when producing components from hard plastic. It’s important to think about how the part will be used and how it will fit within an assembly. Minimizing stress within the molded part is essential to prevent warping or cracking, which can be achieved by maintaining uniform wall thickness throughout the design.
The gate design and its location play a significant role in the quality and efficiency of the injection molding process. Proper gate design ensures that the plastic fills the mold evenly, reducing the risk of defects. Additionally, incorporating draft angles in your mold design will facilitate the easier ejection of parts by reducing friction, offering a key advantage in streamlining production. Applying coats of material, such as silicone or release agents, to the master part can also ensure smooth removal of the final product.
Texturing the mold surface can also improve the aesthetics and functionality of the final part. A textured surface can help disguise imperfections and enhance the overall appearance of the product. When designing your mold, experiment with different materials and techniques to achieve the best results. The mold design process often involves reviewing product information, correcting 3D drawings, and making evaluation assessments.
Creating a Silicone Mold
Creating a silicone mold is a meticulous process that requires careful attention to detail. The first step is to prepare the mold material by mixing the silicone with a catalyst. This mixture is then poured into a container, ensuring that the object to be molded is fully submerged in the silicone. It’s crucial to avoid air bubbles during this process, as they can lead to defects in the final product.
To eliminate air bubbles, a vacuum pump can be employed. This device helps remove any trapped air, ensuring a smooth and defect-free mold. Once the silicone has cured, the mold can be carefully removed from the container, and the original object can be extracted from the mold.
The resulting silicone mold is highly versatile and can be used to produce multiple copies of the original object. For creating hard plastic parts, a release agent is applied to the silicone mold to prevent sticking. A layer of plastic resin is then poured into the mold and allowed to cure. Once cured, the hard plastic part can be removed from the mold. This process can be repeated multiple times, making it an efficient method for producing large quantities of plastic parts.
By following these steps, you can create high-quality silicone molds that are perfect for a variety of applications, from DIY projects to professional manufacturing.
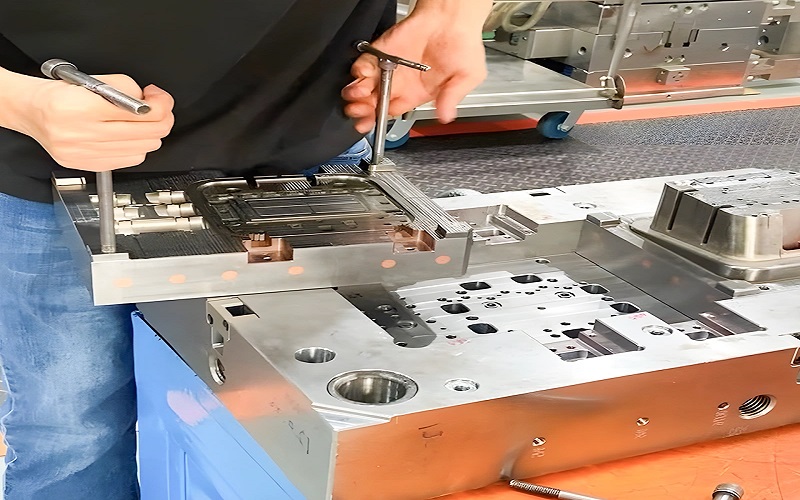
Creating the Mold
Once you have your mold design ready, it’s time to create the mold itself. The process begins with mixing the resin thoroughly in a large bowl to ensure a consistent final product. It’s crucial to maintain an optimal temperature between 70°F to 85°F (21°C – 29°C) during curing, as this can significantly improve the hardening of the resin. Be aware that mastering this process may involve a learning curve, especially for beginners.
Pouring the resin into a mold frame that is slightly larger than the final part requires careful attention to avoid air bubbles. Properly packing the mold frame during pouring helps minimize the occurrence of air bubbles. Tools like a hair dryer can be used to accelerate drying times and ensure a smooth finish. Once the resin has poured and cured, a gentle twisting motion can help safely detach the mold from the frame without causing any damage, allowing it to cure faster and achieve the desired cure.
It’s essential to wear protective gear, including a respirator and gloves, when using resin, as it can emit harmful fumes and particles. By following these steps, you’ll be able to create high-quality molds that are ready for the injection molding process.
Preparing for Injection Molding
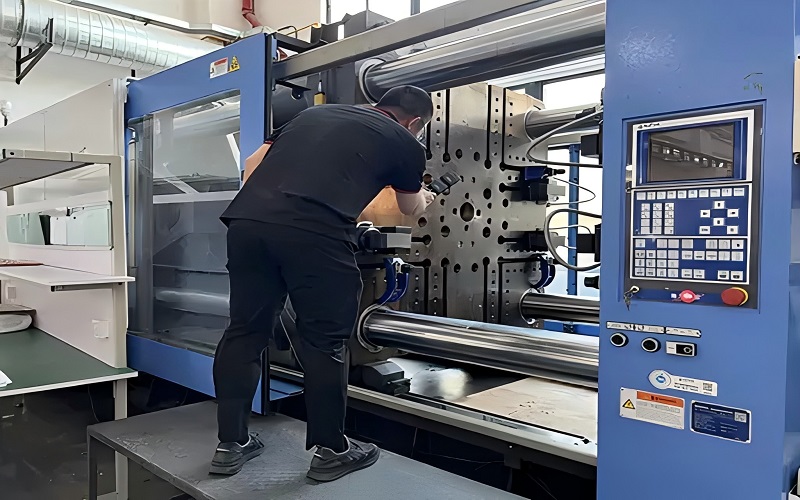
Before starting the injection molding process, it’s crucial to prepare your molds properly to ensure the quality of the final identical parts. Begin by thoroughly cleaning the molds to remove any debris or contaminants from their flat surfaces. Regular upkeep of molds is important to prevent defects in the molded parts and includes using compatible cleaning solutions. To ensure quality control, use forms like the ‘Mold Inspection Summary’ to document the cleaning procedures and inspections.
Once the molds are clean and dry, apply a mold release agent to the surface. This step is essential to prevent the molded parts from sticking to the molds and to facilitate easier removal. There are various types of release agents available, including water-based and solvent-based options, so choose the one that best suits your needs.
Setting up your workspace in a well-ventilated area is also crucial, especially when working with materials that may release fumes. Ensuring a safe and organized work environment will help you achieve the best results and make the injection molding process more efficient.
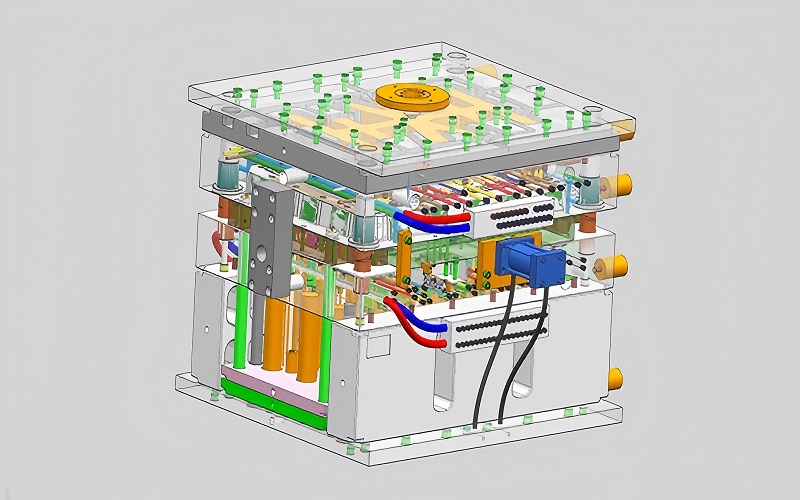
Injection Molding Process
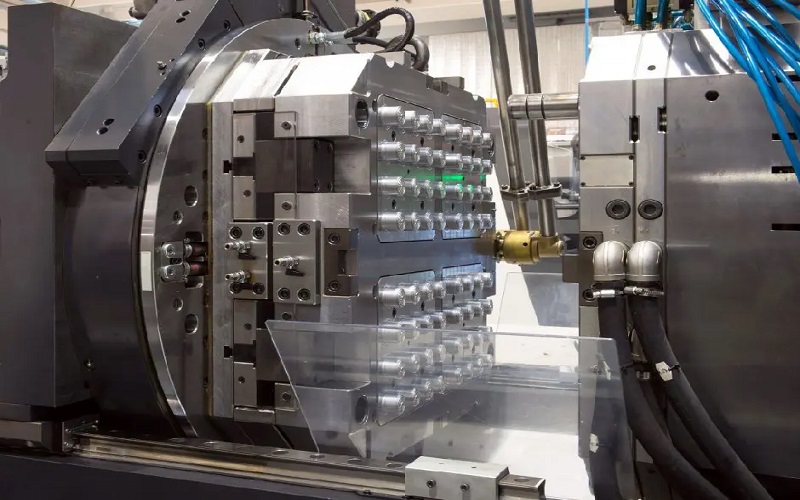
The injection molding process is where the magic happens. It begins by heating and melting the plastic resin, sometimes combined with an epoxy for enhanced properties, until it reaches a liquid state suitable for injection. Once the plastic is melted, it is injected into the mold using high pressure to ensure it fills all cavities evenly, forming a uniform layer. This high-pressure injection is a key aspect of the process, as it guarantees that the plastic conforms to the mold’s shape.
After the mold is filled, the plastic is allowed to cool and solidify, taking the shape of the mold. During this phase, it’s important to minimize excess material or flash, which can be achieved through precise control of injection speed and pressure.
A vacuum pump can also be used to remove air between the mold and the heated plastic sheet, ensuring a snug fit and reducing defects.
Incorporating features like runners and vents directly into the mold can optimize material flow and reduce defects such as warpage and jetting. By understanding and controlling these factors, you’ll be able to produce high-quality plastic pieces through the injection molding process.
Removing and Finishing Your Plastic Pieces
Once the plastic pieces have cooled and solidified, it’s time to carefully remove them from the moulds. This step requires gentle prying to pull them out without damaging both the mould and the pieces. Taking your time during this process will help ensure the integrity of the molded parts.
After removing the plastic pieces, the next step is to finish them through sanding and other post-processing techniques. Sanding is essential to eliminate rough edges and imperfections, enhancing the aesthetic quality of the plastic items. Different grades of sand can be used to achieve various finishes, from rough to fine, depending on the desired outcome.
Post-processing steps can significantly enhance the surface finish and overall quality of the molded pieces, making them more market-ready. By carefully removing and finishing your plastic pieces, you’ll achieve professional-looking results that you can be proud of.
Troubleshooting Common Issues
Even with the best preparation, common issues can arise during the mold-making process. One of the most prevalent problems is the form of air bubbles, or air traps, which occur when air cannot escape during the injection process. This is often due to inconsistent walls thickness in the molds, leading to holes.
To prevent air bubbles, ensure consistent wall thickness and consider using vacuum techniques to remove air before injecting. Additionally, using the right resins is crucial to avoid defects and ensure a smooth casting process. By addressing these issues, you’ll be able to produce high-quality molds with fewer defects.
Safety Precautions

Safety should always be a top priority when working with mold-making materials and equipment. Ensure that you work in a well-ventilated area to avoid inhaling harmful fumes from materials like polyurethane casting resin. Using an organic vapor-rated respirator can protect you from extremely toxic fumes.
Additionally, wearing personal protective equipment such as gloves and safety goggles is essential when handling mold release agents. When working with hot materials, protective gear like a thick leather apron and closed shoes is necessary to prevent burns.
Applying coats of protective material, such as silicone or release agents, to the master part is crucial to prevent sticking and ensure smooth removal of the final product.
Having a fire extinguisher nearby is also a wise precaution, especially when working with materials that involve high heat or fire risk. Always have a partner nearby when performing tasks that could lead to accidents for immediate assistance. By following these safety precautions, you can ensure a safe and productive mold-making experience.
Advanced Tips for Custom Molds
For those looking to take their mold-making skills to the next level, advanced tips for creating custom molds can be incredibly valuable. Scaling production with multi-cavity molds allows for the simultaneous casting of multiple items, such as bottles, enhancing efficiency and reducing production time.
CNC machining provides the flexibility to create intricate designs and precise features in custom molds, opening up new possibilities for innovative projects. Achieving textured finishes can be done through methods like bead blasting or chemical etching, offering a unique look to molded pieces, which can then be cured in an oven for added durability.
Plaster can be utilized as a durable shell, referred to as a mother shell, during the creation of two-part molds, particularly when working with molding putty and silicone.
Applying a finish such as polishing or a protective coat can significantly improve the surface quality and visual appeal of molded plastic products. By incorporating these advanced techniques, you can create custom molds that stand out and meet your specific paint needs.
Summary
Throughout this guide, we’ve covered the essential steps for creating plastic molds, from choosing the right materials to advanced tips for custom molds.
Casting techniques and the use of resins are crucial in the mold-making process, ensuring accurate and high-quality outcomes.
By following the detailed instructions and safety precautions provided, you’ll be well-equipped to create high-quality molds and plastic pieces.
Remember, the key to success in mold making lies in careful preparation, attention to detail, and a willingness to experiment and learn from the process.
Frequently Asked Questions
What is the best material for making molds?
Silicone is the best material for molds due to its cost-effectiveness and flexibility, making it ideal for DIY projects. Depending on specific project needs, urethane and metal molds can also be advantageous.
How can I prevent air bubbles in my molds?
To effectively prevent air bubbles in your molds, maintain consistent wall thickness and employ vacuum techniques to eliminate air prior to injecting the resin. This approach will lead to better results in your molding process.
What safety precautions should I take when making molds?
To ensure your safety when making molds, work in a well-ventilated area, wear gloves and safety goggles, and use an organic vapor-rated respirator. Additionally, keep a fire extinguisher nearby and have a partner available for emergencies.
How do I achieve a smooth finish on my molded plastic pieces?
To achieve a smooth finish on molded plastic pieces, start by sanding with different grades of sandpaper to remove rough edges and imperfections. Follow up with polishing for optimal results.
What are some advanced tips for creating custom molds?
To enhance your custom mold creation, consider utilizing multi-cavity molds for greater efficiency, CNC machining for detailed designs, and finish techniques such as bead blasting or chemical etching for added texture. These strategies can significantly improve both the quality and productivity of your molds.