Need to know how to shape EVA foam for your project? This guide covers everything—from picking the right foam to mastering heat forming techniques. Read on to turn flat foam sheets into amazing 3D creations.
Choosing the Right EVA Foam
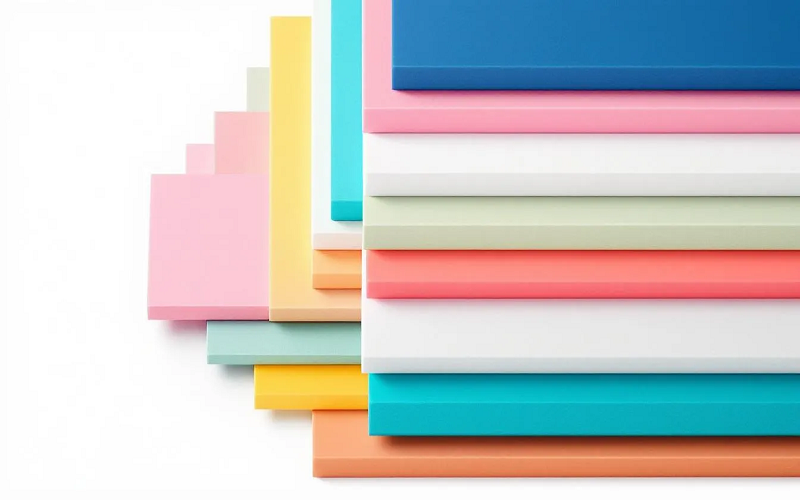
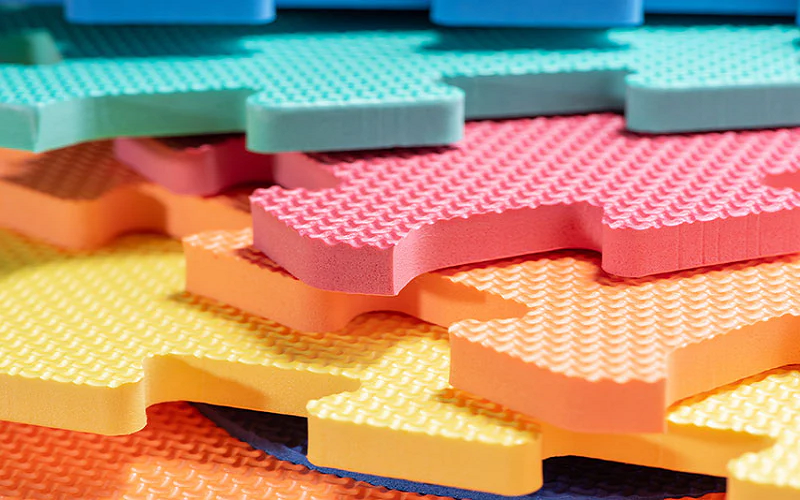
Choosing the appropriate EVA foam is key to a successful project. Available in various colors and finishes, EVA foam mats can meet different needs and aesthetic preferences. Options range from smooth surfaces to printed wood grain patterns.
For larger builds like full-body armor, EVA foam gym mats are favored for their textured surfaces and durability. For intricate detailing, 1mm EVA foam works best. Knowing the foam’s thickness and density is important; EVA foam ranges from 1mm to 6mm, with thicker foam options providing better shape retention.
Cost is also a factor. Tile packs of EVA foam typically cost around $17, while rolls can be about $24, depending on type and dimensions. Choosing the right foam from the start saves time and effort, enhancing your project’s enjoyment and efficiency.
With your EVA foam ready, gather the necessary tools to bring your creation to life. Ensure you have extra blades for precise cutting, as dull blades can ruin intricate details. The painting process is crucial for a polished look—start with a base coat to prime the foam surface, followed by careful brush strokes to add color and texture, ensuring a professional finish.
Tools You’ll Need
The right tools can significantly impact your project. A heat gun is essential for shaping EVA foam, enabling you to soften and mold it as needed. Keep a distance of about 4 inches to avoid overheating.
Precision cutting tools are crucial:
- An X-acto knife is ideal for detailed work.
- A utility knife handles larger cuts.
- Always use a cutting mat to protect surfaces and ensure clean cuts.
- For intricate designs, a rotary cutter is beneficial.
Hot glue gun are ideal for quick and secure assembly of EVA foam pieces. Other useful tools include scissors, razor knives, and box cutters. A steady hand and sharp blades ensure clean lines and prevent jagged edges.
Once your tools are ready, start creating templates and patterns to guide your cutting and shaping process.
Creating Templates and Patterns
Templates and patterns act as your project’s blueprints. Using body measurements to create templates from poster board ensures accurate fitting for costumes or props, minimizing material waste and ensuring precision.
Pep files, 3D models mapped in 2D, are another excellent resource for pattern creation methods. These files offer a great idea for detailed guides that can be printed and traced onto your EVA foam using the same method. For fun things like an Iron Man suit, pep files can provide intricate patterns to craft a detailed whole piece, ensuring every component aligns perfectly.
With templates ready, proceed to cutting and trimming the foam.
Cutting and Trimming EVA Foam
Cutting and trimming EVA foam necessitates the right tools and techniques. Recommended tools include:
- X-acto blades
- Hot knives
- Scissors
- Razor knives
- Box cutters
Sharp blades are essential; unlike a dull blade, which can tear the foam, leading to uneven cuts on one side of the thin edge.
For clean and precise cuts:
- Always use a sharp knife and replace the blade if it starts dragging.
- Practice on scrap foam to hone your technique.
- Trace outlines and mark important points on your foam patterns to guide accurate cutting and shaping.
After cutting your craft foam pieces, use heat forming techniques to shape them into three-dimensional forms.
Heat Forming Techniques Using a Heat Gun
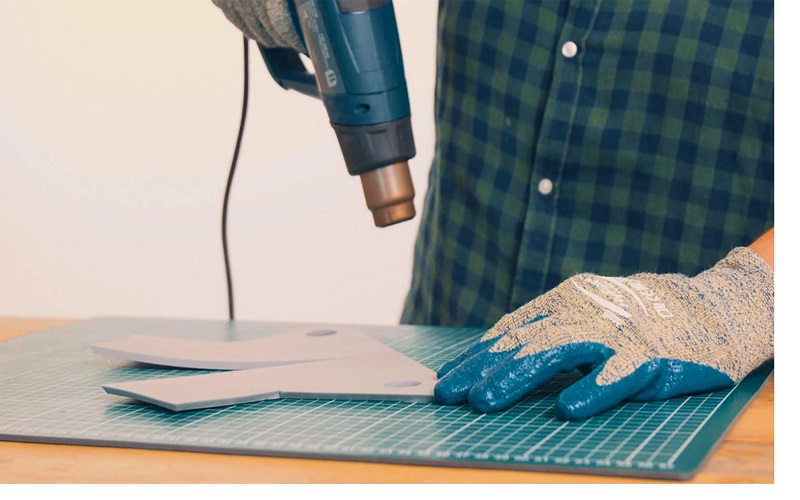
Heat forming transforms flat foam pieces into dynamic, three-dimensional shapes. Heating EVA foam makes it malleable, enabling the creation of complex curves and shapes for props and armor. A heat gun, such as one available from Harbor Freight, is the primary tool for this process.
Instructions for heating and shaping foam:
- Gradually heat the foam to avoid burning or damaging it.
- Heat evenly in small increments to help retain its shape without compromising structural integrity.
- For compound curves, pull the heated foam around a rounded object, optionally wrapping it with fabric to smooth out imperfections.
- Let the foam cool to retain the molded shape, ensuring no stuff like debris interferes with the process.
The foam’s surface will change from matte to shiny when heated correctly. Patience is essential; allowing the foam to cool slowly improves shape retention. After mastering basic shaping, move on to more complex forms.
Shaping Complex Forms
Shaping complex forms like armor or props requires:
- Precision and proper techniques.
- Avoiding reheating already molded areas to prevent damage.
- Patience and careful attention to detail when molding EVA foam into intricate shapes, hoping to achieve the best results.
Using multiple pieces can help achieve the desired complexity in small projects. For instance, creating a Star Wars blaster involves shaping several smaller pieces before assembling them into the final prop.
Most people find that experimenting with different techniques, like using a table to lay out pieces or choosing to flip pieces for symmetry, enhances precision. With experience, you’ll find many ways to shape EVA foam to match your vision.
Once your shapes are formed, proceed to glue and assemble the pieces.
Gluing and Assembly
Gluing and assembling EVA foam pieces is where your project starts to come together. A high-temp glue gun with high-temp glue sticks is the most common adhesive. For larger projects, 3M Spray adhesive (Super 77) is a reliable alternative.
For attaching straps, hot glue or Loctite epoxy works well. Materials like nylon webbing, leather straps, and cording are typically used for securing EVA foam costumes. Contact cement is another option for securely attaching straps.
Once your flat pieces are glued, smooth the seams and edges for a polished look.
Smoothing Seams and Edges
Smoothing seams and edges is key for a professional finish. Here’s how to achieve it:
- Heat and sand the foam to smooth out rough edges.
- Use your fingers to further smooth the edges while they are warm.
- Use a mouse sander with 50/60 grit paper for initial sanding.
- Follow up with 300 grit paper for a fine finish.
Acrylic latex caulk adheres well to EVA foam and is effective for smoothing seams. To achieve sleek seams and edges, follow these steps:
- Use a putty knife to apply the caulk.
- Wet your fingers to feather the edges for a smoother finish.
- Combine heat, sanding, and latex caulk to enhance your project.
Now, add texture and detail to bring your creation to life.
Adding Texture and Detail
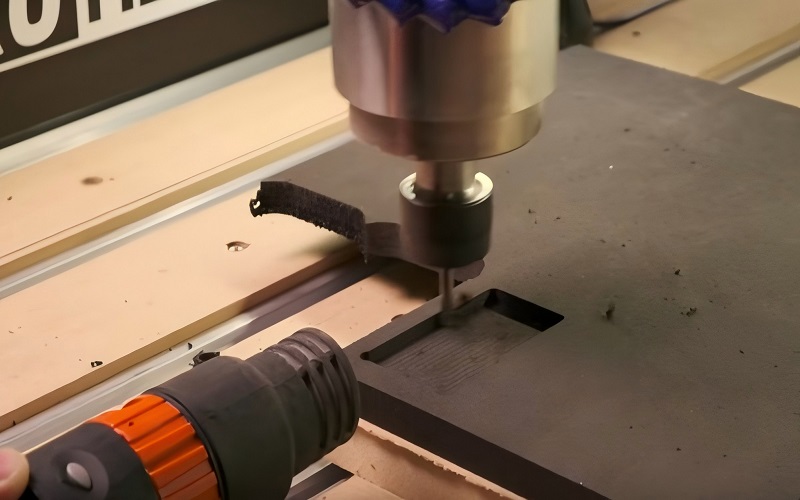
Adding texture and detail can elevate your EVA foam project. A rotary tool is excellent for creating pits and scratches quickly, adding realism. For finer detailing, a soldering iron can create intricate lines, such as bullet holes.
Practicing weathering techniques on scrap foam helps master the process and adds a realistic worn look to your project. Randomly damaging the foam with a rotary tool and soldering iron can simulate real wear and tear, enhancing visual realism.
With details in place, proceed to priming and painting your project.
Priming and Painting
Priming and painting are crucial for a professional finish. Applying 2-3 coats of primer like Plastidip prevents paint absorption and maintains the foam’s flexibility. Brush-on primers can enhance paint adhesion, ensuring a smooth finish.
For painting, Rustoleum is recommended for a durable finish. Follow these steps:
- Start with a base layer of bright metallic silver.
- Apply hammered silver for a worn appearance.
- Avoid painting the inside of armor pieces to prevent flaking.
A clear coat sealant can provide a glossy finish and additional protection. ‘Through The Roof’ is highly recommended for its strong protective qualities. With your paint job complete, proceed to seal and protect your work.
Sealing and Protecting Your Work
Sealing your painted EVA foam prevents paint damage and ensures longevity. Plasti Dip or Mod Podge are commonly used sealants that provide a durable finish. Matte sealant is recommended for wood props made of EVA foam to ensure a smooth, professional look.
Apply 2-3 layers of sealant to protect your paint job. Use a makeup wedge to apply the sealant evenly, avoiding pooling in grooves. Sealing your project prevents paint cracking and keeps your creation looking great for years.
Once sealed, the final step is assembly and fitting.
Final Assembly and Fitting
Final assembly and fitting ensure your EVA foam costume is comfortable and functional. Use nylon webbing for assembling costumes, as it provides a strong and flexible hold. Before wearing, verify that your costume fits properly and is comfortable.
If straps or buckles are visible, consider painting them to blend with the rest of your costume. This attention to detail will give your project a polished, professional look. With everything in place, you’re ready to show off your masterpiece.
Summary
Throughout this guide, we’ve covered the essentials of working with EVA foam, from choosing the right materials to the final assembly and fitting. By following these steps, you can create stunning, professional-quality projects, whether it’s a detailed prop or a full-body costume.
Remember, the key to success is patience and practice. Each step, from cutting and shaping to gluing and painting, requires attention to detail and a steady hand. With time and experience, you’ll master the art of working with EVA foam.
Now, it’s time to bring your creative visions to life. Gather your materials, follow these techniques, and embark on your next EVA foam adventure. Happy crafting!
Frequently Asked Questions
What type of EVA foam should I use for detailed work?
For detailed work, go with 1mm EVA foam—it’s super thin and flexible, making it perfect for those intricate designs you want to achieve.
What tools are essential for working with EVA foam?
You’ll definitely want a heat gun, X-acto knife, utility knife, cutting mat, rotary cutter, and hot glue gun in your toolkit for working with EVA foam. These tools will make your crafting much easier and more efficient!
How do I create smooth seams and edges on EVA foam?
To get those smooth seams and edges on EVA foam, just heat it up and sand it down, using your fingers to smooth out the edges while it’s warm. You can also use acrylic latex caulk for extra smoothness on seams.
What should I use to seal and protect my painted EVA foam?
Using Plasti Dip or Mod Podge is a solid choice to seal and protect your painted EVA foam. Just slap on 2-3 layers for the best results and to keep that paint looking fresh!
How do I create smooth seams and edges on craft foam?
To achieve smooth seams and edges on craft foam:
- Heat Forming: Use a heat gun to warm edges, then press with fingers or a tool to smooth them.
- Sanding: Use 400-600 grit sandpaper to refine edges and seams post-gluing.
- Caulk: Apply acrylic latex caulk to seams, wiping excess for a seamless finish, saving money by reducing material waste.