Want to make a mold with silicone?
This guide covers all the steps involved in making a mold with silicone: gathering materials, preparing your workspace, mixing, pouring, and curing. Let’s get started!
Understanding Silicone Molds
Silicone molds have become a staple in various industries, from prototyping and jewelry making to food production and consumer goods.
Their flexibility allows for easy shaping and removal of molded items, making them a favorite among artists and manufacturers alike.
The primary benefit of using silicone molds is their ability to reproduce unique art effortlessly, allowing creators to bring their intricate designs to life.
One of the standout features of silicone molds is their resilience. Key characteristics include:
- Silicone’s inorganic properties make it resistant to heat, chemicals, and potential fungal growth, ensuring durability and effectiveness over time.
- These molds can withstand temperatures ranging from -65°C to 400°C, making them suitable for both freezing and baking applications.
- Food-grade silicone molds are particularly popular for baking and creating confections, due to their heat resistant properties and safety.
Silicone molds are also incredibly durable and cost-effective. They can be used repeatedly without chipping or breaking, which is ideal for detailed designs.
This durability, combined with the ability to capture intricate details, makes silicone molds a valuable tool for artists and crafters. Whether you’re casting:
- concrete
- plaster
- hydrocal
- polymer clay
- low-temperature metal silicone molds offer a versatile solution for a wide range of projects.
Essential Materials for Silicone Mold Making
To get started with silicone mold making, you’ll need a few essential materials. A basic silicone molding kit typically includes:
- A master pattern
- Liquid silicone (such as Smooth-On OOMOO 30, popular for its ease of use and reliable results)
- A nonporous container for the mold
- A mold release agent (like Smooth-On universal mold release, crucial for preventing the silicone from adhering to the master pattern and ensuring a clean and easy release)
In addition to these core materials, you’ll need mixing containers to properly blend the silicone and other components.
It’s also important to wear gloves while handling silicone to prevent skin irritation and contamination of the material.
Having all the right following materials, such as silicone rubber, mold release agents, mixing containers, and gloves, ensures a successful and smooth mold-making process.
Preparing Your Workspace
Before diving into the mold-making process, it’s crucial to prepare your workspace properly.
A well-ventilated area is essential to avoid inhaling fumes from liquid silicone, silicone putty, or silicone sealant.
Covering your workspace with plastic or paper prevents damage from accidental spills of molding putty or silicone sealant and makes cleanup easier.
Always prioritize safety by using gloves and a mask when handling silicone, silicone putty, or related materials, especially when applying silicone sealant with a caulking gun.
A flat and stable work surface is essential for setting up the mold box, ensuring even pouring and consistent results.
These precautions help create a safe and efficient environment for your mold-making projects.
Creating a Mold Box

Creating a mold box is a vital step in the silicone mold-making process. The mold box serves as a container to hold the liquid silicone and the master pattern, ensuring that the silicone sets in the desired shape. You can construct a mold box from various materials, such as:
- Cardboard
- Foam core
- Acrylic sheets
- Plastic containers
- Empty milk cartons
The key is that the mold box should be sturdy and leak-proof to provide a stable and leak-resistant covered container.
When working with materials like plexiglass, it’s important to:
- Ensure that the seams are well-sealed to prevent silicone leakage.
- Use hot glue to seal the edges of an acrylic paint mold box, creating a watertight container.
- Line the interior of cardboard mold boxes with packing tape to prevent the silicone from being absorbed.
To ensure a high-quality mold, follow these guidelines:
- Leave a gap of about 1/2 to 3/4 inch around your object to capture adequate detail and maintain structural integrity.
- Carefully construct your mold box to ensure that the silicone flows smoothly around your master pattern.
- This careful construction helps capture all the intricate details and creates a high-quality mold.
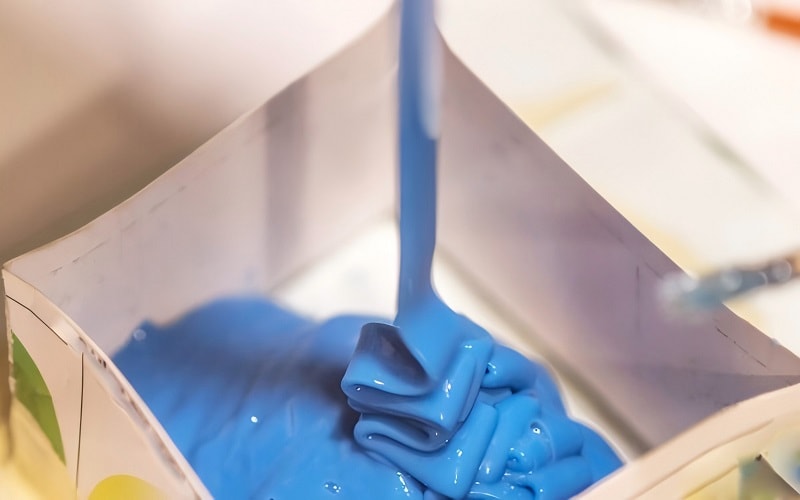
Mixing the Silicone
Mixing the silicone is a critical step in the mold-making process. To ensure accuracy:
- Use a digital scale to weigh the silicone and catalyst.
- Make sure you have enough silicone to cover the entire master inside the mold box.
- Measure by weight rather than volume to avoid inaccuracies and ensure proper curing.
Once you’ve measured the components, thoroughly mix part B and A, including any silicone caulking, according to the manufacturer’s instructions.
Scrape the sides and bottom of the mixing container to ensure all components, such as air dry clay or silicone caulking, are fully combined.
The mixed silicone should have a uniform color and texture, indicating that it has been properly blended and is free of acetic acid residue.
Timing is crucial, so mix the silicone within the specific timeframe recommended by the manufacturer to achieve the best results, especially for small molds that require precision.
Following these steps helps create a consistent and reliable silicone mixture that’s ready for pouring and will be completely cured as intended.
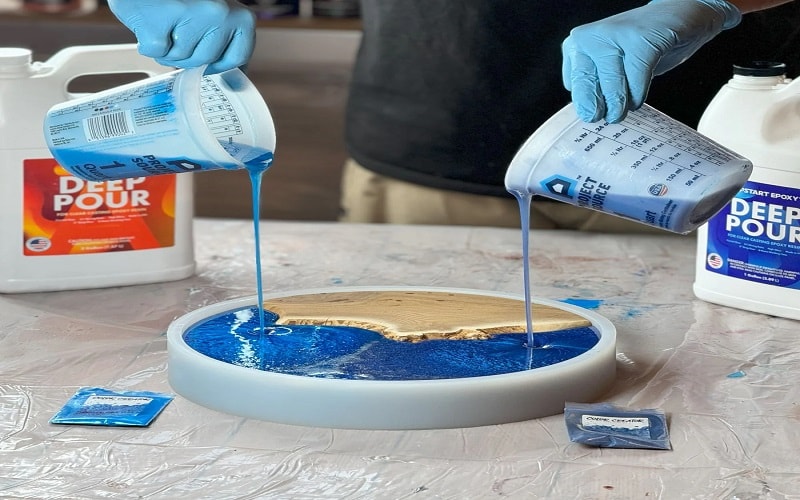
Pouring the Silicone
Pouring the silicone correctly is essential to avoid air bubbles and achieve a smooth mold. Follow these steps:
- Pour the silicone slowly from several inches away to allow it to flow evenly and release any trapped air.
- Pouring from a height helps the silicone cover the object smoothly.
- This technique minimizes the formation of air bubbles.
Start by listing some forbidden forms of the keyword “tip” according to the rule 5. Reduce bubbles by keeping the pour concentrated in one area and gently tapping the sides of the mold box or the bottom of the mold tray after pouring.
This tip helps release any remaining trapped air and ensures a smooth, bubble-free ball mold to fill in a few hours.
Using these techniques helps create a high-quality silicone mold ready for Cure.
Curing the Mold
Curing the silicone mold is a crucial step that requires patience and attention to detail to make molds that are durable.
Follow the manufacturer’s instructions for the recommended curing time and conditions to ensure the silicone fully sets and achieves its intended properties.
If you encounter issues with mold release, such as items stuck inside, using external mold release agents or adjusting the mold temperature can improve the release process.
Proper curing ensures your silicone mold is durable, flexible, and ready for use in various projects, including food-safe applications.
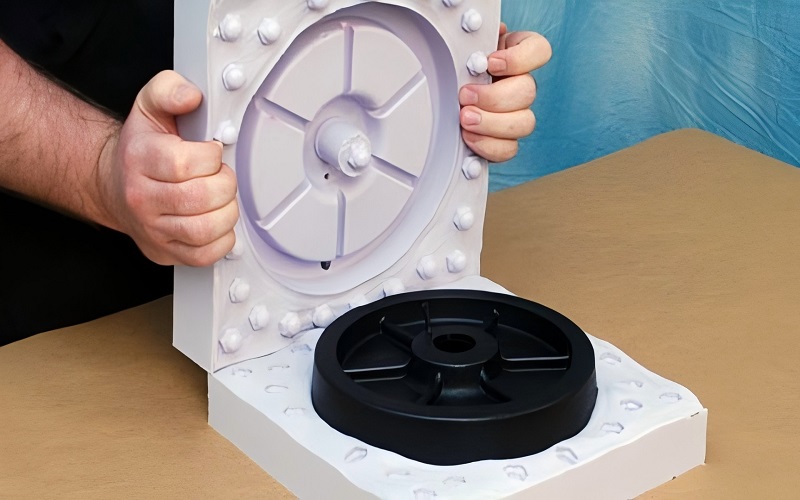
Removing the Mold
Once the mold has fully cured, it’s time to gently remove it from the mold box. Gently pull the master pattern out, being careful not to damage the mold. You may need to bend the mold backward slightly to loosen the item.
With patience and care, you’ll have a perfectly formed form silicone mold ready for your creative projects.
Cleaning and Maintaining Silicone Molds
Cleaning and maintenance are crucial for extending the life of your silicone molds. Follow these steps:
- Wash silicone molds with warm water and mild dish soap.
- Rinse thoroughly.
- Let them dry completely.
- Soak them in warm soapy water to help loosen residues, especially after using the molds with strong materials.
Tips for cleaning and storing silicone molds:
- Use baby wipes to effectively remove dust from silicone molds.
- Use dental floss or toothpicks to assist in cleaning hard-to-reach areas of intricate molds.
- Store your molds in clear containers to prevent dust accumulation.
- Retire molds if they show signs of discoloration or residue buildup.
Following these practices ensures your silicone molds remain in top condition for multiple uses.
Common Issues and Troubleshooting
Despite your best efforts, you might encounter some common issues during the mold-making process. Air bubbles can be a problem, especially during mixing and pouring. Some recommend using a vacuum chamber to degas the silicone before pouring to eliminate bubbles.
Another issue is the cast heating up due to a chemical reaction during the curing process, which can cause problems if not managed properly. Flash, or excess plastic that leaks out along the part line, can lead to parts sticking to molds if not adequately addressed.
Being aware of these potential problems and knowing how to troubleshoot them improves the quality of your silicone molds.
Creative Uses for Silicone Molds

Silicone molds open up a world of creative possibilities. You can use them to make unique desserts like shaped gummy candies and personalized chocolates. They’re also great for crafting bath products such as homemade bath bombs.
For those who enjoy making decorative items, silicone molds are perfect for creating:
- resin coasters
- unique jewelry pieces
- candle holders
- planters
With silicone molds, your imagination is the only limit to the fun shapes you can create.
Summary
In summary, silicone mold making is a fun and rewarding process that opens up endless creative possibilities.
By understanding the materials, preparing your workspace, and following the steps for creating, curing, and maintaining your molds, you can achieve professional-quality results.
So why wait? Start making your own silicone molds and bring your creative ideas to life!
Frequently Asked Questions
What materials do I need to make a silicone mold?
To make a silicone mold, you’ll need a master pattern, liquid silicone, a nonporous container, and a mold release agent. Get those supplies, and you’re all set to create your mold!
How can I avoid air bubbles in my silicone mold?`
To avoid air bubbles in your silicone mold, pour slowly from a height and give the mold box a few taps to help release any trapped air. That should do the trick!
What should I do if my silicone mold isn’t curing properly?
If your silicone mold isn’t curing properly, try extending the curing time or subtly raising the temperature as the manufacturer suggests. It usually helps get things back on track!
How do I clean and maintain my silicone molds?
To keep your silicone molds in great shape, just wash them with warm soapy water, rinse, and let them dry completely. Storing them in clear containers can also help keep dust off!
What are some creative uses for silicone molds?
Silicone molds are super versatile! You can whip up desserts, craft resin coasters, or even make cool jewelry and candle holders.