Curious about how to use Plasti Dip on EVA foam for your cosplay projects?
In this guide, you’ll learn the proper preparation techniques, application methods, and tips to achieve a professional, durable finish with Plasti Dip EVA foam.
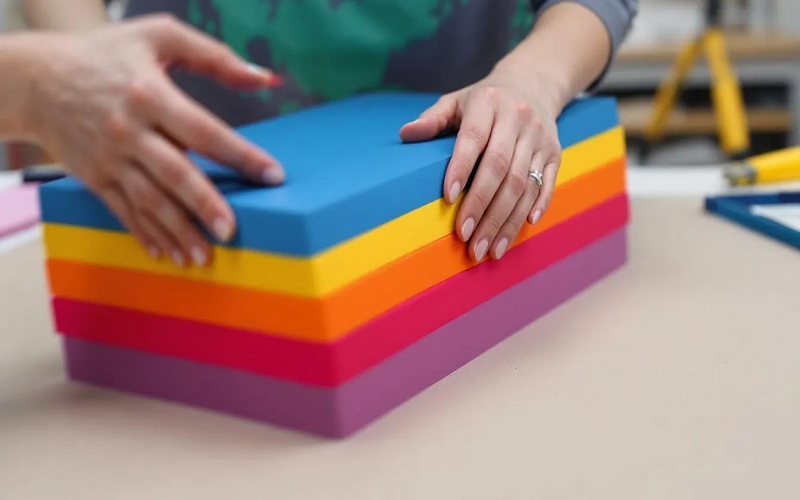
Preparing EVA Foam for Plasti Dip
Achieving a flawless Plasti Dip application starts with properly preparing your EVA foam. Begin by cleaning the foam thoroughly, as dust and debris can cause uneven adhesion and a bumpy finish.
To clean EVA foam:
- Wipe down the foam with a damp cloth to remove surface dust.
- For tougher dirt, use a mild soap solution.
- Make sure the foam is completely dry before proceeding.
A clean, dust-free surface turned needed truck promotes great adhesion and good issue prevents uneven finishes.
After cleaning, inspect the foam for rough edges or imperfections. Lightly sanding the surface can help create a smooth base, but avoid over-sanding to prevent damage. Proper preparation ensures a professional-looking costume piece.
Priming EVA Foam with Plasti Dip
Priming EVA foam with Plasti Dip is essential for project success. Plasti Dip seals the foam’s surface, preventing uneven paint absorption and improving adhesion of subsequent layers, while maintaining the flexibility and durability of the finished piece in an inconspicuous area.
Begin by applying a light coat of clear Plasti Dip to the foam for even coverage, starting with a test in an inconspicuous area to ensure compatibility. This initial coat seals the foam and creates a smoother base for additional paint layers. Shake the can well before spraying to ensure consistent application. Let each coat fully dry for about 30 minutes before applying the next to achieve a uniform and durable finish.
For an even smoother base, use a sandable primer before applying Plasti Dip. This can:
- Enhance the durability of your costume piece
- Improve the appearance by creating a sealed, even surface
- Help withstand painting and cosplay wear and tear
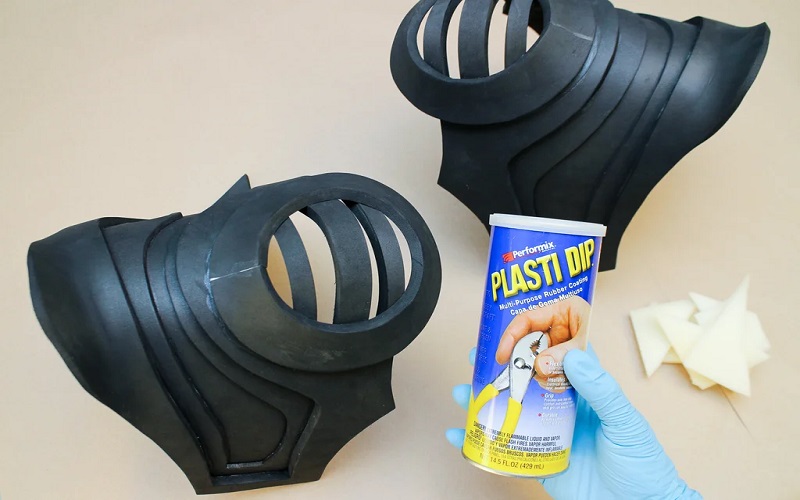
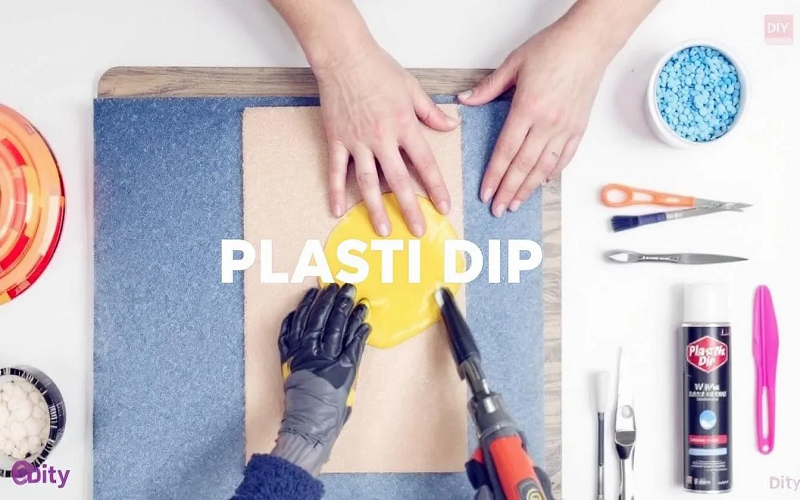
Applying Plasti Dip: Techniques and Tips
Applying Plasti Dip requires patience and precision. Spray multiple light coats instead of one thick coat to avoid drips and achieve a smoother, professional finish. Maintain a consistent distance of 6-12 inches from the surface to prevent uneven application.
To apply Plasti Dip effectively:
- Shake the Plasti Dip cans thoroughly before starting to ensure even application.
- Avoid inconsistencies by ensuring the contents are well mixed.
- Use controlled, sweeping motions to cover the surface evenly while spraying.
Let each coat dry for about 30 minutes before applying the next. This wait results in a smooth, durable surface. Each layer adds resistance to damage and enhances the foam’s polished appearance, preparing it for the final paint job.
Achieving Desired Finishes with Plasti Dip
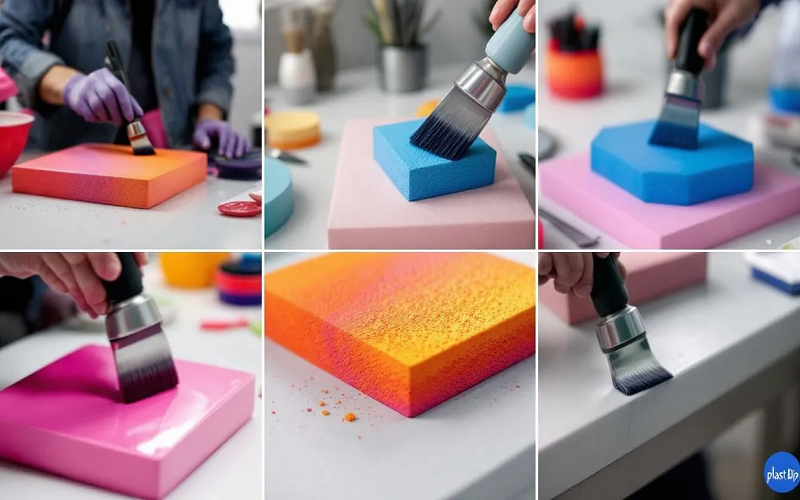
Plasti Dip offers a variety of finishes, from metallic sheen to rubber-like texture. For a smooth, professional finish, use a combination of painted layers and a spray topcoat of plastidip.
For unique textures, apply Plasti Dip with foam wedges or makeup sponges instead of paintbrushes, which can leave visible strokes. Gunmetal grey Plasti Dip is popular among cosplayers for adding a metallic illusion with depth and realistic finish.
Applying a clear coat of Plasti Dip can protect your paint job and add a glossy finish. Since experiences with clear Plasti Dip can vary and sometimes result in peeling, test it on a small area first to ensure it meets your expectations without compromising your work.
Common Mistakes and How to Avoid Them
Even experienced cosplayers can make mistakes with EVA foam and Plasti Dip, such as when crafting a grill or intricate costume details. Using a dull blade for cutting foam can lead to uneven edges, so always keep your blades sharp for clean, precise cuts, especially when shaping a grill.
Using hot glue for interior seams is another common mistake. Though convenient, hot glue can reactivate under heat, causing seams to come apart, potentially affecting delicate areas like those near a finger joint. A sealer like contact cement offers a stronger, more reliable bond.
Improperly cleaning the foam before application can lead to adhesion issues. A dust-free surface is crucial for a smooth finish. Avoiding these pitfalls saves time and frustration, ensuring your project, whether it involves a grill or finger details, looks its best.
Enhancing Durability with Plasti Dip
Durability is crucial in cosplay, especially for frequently used pieces. Plasti Dip enhances EVA foam’s durability by adding multiple protective layers. Each coat reduces the foam’s tendency to tear and extends the life of your costume pieces.
Multiple layers of Plasti Dip enhance durability and offer customization options. Whether you prefer matte or glossy surfaces, this flexibility is appreciated by cosplayers whose props need to withstand the rigors of conventions and photoshoots.
For added protection, seal your painted EVA foam with a clear sealant. This adds extra shine and safeguards your paint job from wear and tear. Alternatives like Krylon satin varnish are also popular for their non-cracking properties.
Removing Plasti Dip from EVA Foam
You may need to remove Plasti Dip from your EVA foam creations due to mistakes or repurposing materials. Fortunately, Plasti Dip is designed to be peelable, making removed relatively easy.
To remove the Plasti Dip:
- Gently peel the Plasti Dip starting from the edges.
- If it resists, use a plastic scraper or fingernails to lift the edges.
- For stubborn areas, use low heat from a hairdryer to loosen the Plasti Dip.
- Be gentle to avoid damaging the foam underneath.
Community Experiences and Tips
The cosplay community is rich with wisdom and experience. Many cosplayers suggest testing your Plasti Dip technique on scrap foam before working on your final project. This practice allows you to refine your technique and gain confidence in the application process, leaving you impressed with the results.
Practicing on scrap materials can significantly improve the quality of your finished piece. It helps perfect your spraying technique, control the number of coats, and achieve the desired finish. The more you practice, the better your results, making your final costume pieces truly stand out when they are sprayed.
Learning from others’ experiences can save you time and frustration. Cosplayers often share tips and tricks on forums and social media, providing valuable insights into what works and what doesn’t in their post. Engaging with the community helps you find answers to common questions and discover new techniques.
Choosing the Right Plasti Dip Products
Choosing the right Plasti Dip product is essential for project success. Check the expiration date and quality of the Plasti Dip before application, as outdated or poor-quality products can affect the finish.
Many cosplayers prefer black Plasti Dip as a foundational layer. It effectively covers imperfections and marker lines, providing a solid base for further painting. To add depth to your paint job, apply a layer of black Plasti Dip beneath a colored layer, like gunmetal grey, for a stunning effect.
With various colours and finishes available, you can customize your white props and armor to your liking. Choosing the right product to buy based on your specific needs ensures your costume pieces look professional and are worth the long test of time, and you can flex some fun stuff to enhance the overall effect with your car.
Safety Precautions and Best Practices
Safety is crucial when working with Plasti Dip. Follow these precautions to ensure a safe and productive working environment:
- Work in a well-ventilated area to avoid inhaling harmful fumes.
- Wear protective gloves to prevent skin contact, as Plasti Dip is difficult to remove from skin.
- Keep a fire extinguisher nearby since Plasti Dip is flammable.
- Avoid eating or drinking in the work area to prevent chemical contamination.
Careful workspace planning and necessary precautions prevent accidents and keep your focus on creating stunning cosplay pieces. Prioritizing safety allows you to enjoy the process without unnecessary risks.
Summary
Mastering Plasti Dip on EVA foam can significantly enhance the quality and durability of your cosplay creations. From preparing the foam and applying Plasti Dip to achieving desired finishes and avoiding common mistakes, every step is crucial for a professional-looking result.
By following these tips and learning from the community, you’ll be well on your way to creating stunning, durable costume pieces. Embrace the process, experiment, and let your creativity shine. Happy crafting!
Frequently Asked Questions
Why is it important to clean EVA foam before applying Plasti Dip?
Cleaning EVA foam is essential before applying Plasti Dip, as it removes dust and debris, leading to improved adhesion and a smoother finish. This preparation ultimately enhances the durability and appearance of the coating.
How many coats of Plasti Dip should I apply for best results?
For best results, apply multiple light coats of Plasti Dip to ensure a smooth, durable finish while avoiding drips.
Can I use hot glue for my EVA foam seams?
It’s advisable to use contact cement for EVA foam seams instead of hot glue, as hot glue may weaken under heat, leading to potential seam separation.
How does using an aerosol spray affect Plasti Dip application on EVA foam for cosplay?
Using an aerosol spray for Plasti Dip application on EVA foam allows cosplayers to achieve a smooth, even coating with precise control, ideal for intricate costume designs. Applying multiple light coats from an aerosol spray ensures better adhesion and a professional finish without excess buildup.
Why is drying time important when applying Plasti Dip to EVA foam for cosplay?
Proper drying time between Plasti Dip coats on EVA foam is crucial for cosplayers to prevent tackiness and ensure a durable, flexible finish. Allowing sufficient drying time, typically 15-30 minutes per coat, helps maintain the costume’s integrity and enhances its longevity during use.