Looking for silicone to make molds? This guide will help you choose the best type and show you how to use it. Discover top recommendations and essential tips for successful mold making.
Getting Started with Silicone Mold Making

Silicone mold making is a flexible process that allows you to create precise replicas by pouring silicone over a model. The process typically involves preparing a model, mixing the silicone, and allowing it to cure, resulting in durable molds that can handle a variety of materials, like casting resins, resin casting, wax, and molding.
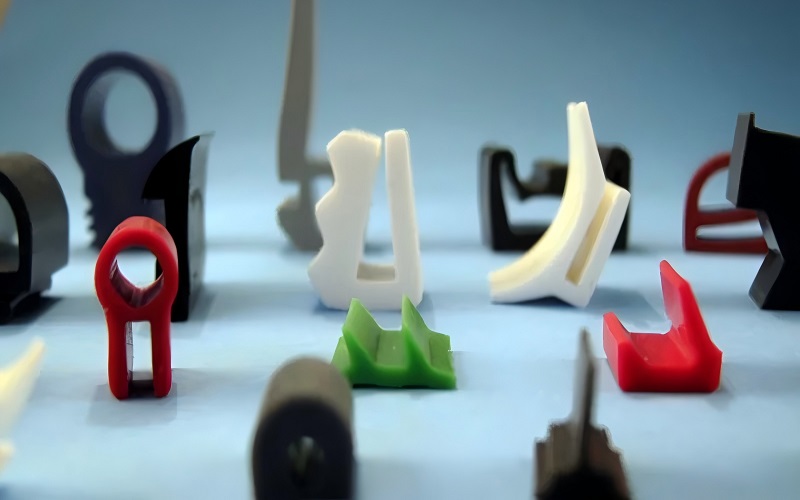
Understanding the properties of silicone materials is essential when beginning. Silicone rubbers are known for their flexibility, durability, and ability to capture fine details, making them ideal for both simple and complex mold designs, including those crafted from materials like wood. Silicone’s versatility allows for mold creation in various fields, including jewelry making, prototyping, and culinary applications.
Familiarizing yourself with curing times and environmental factors is crucial for successful silicone mold making. Knowing these details will help you plan your projects better and achieve the best results, especially when working on a scale that requires precise measurements and consistent outcomes.
Essential Materials for Silicone Molds
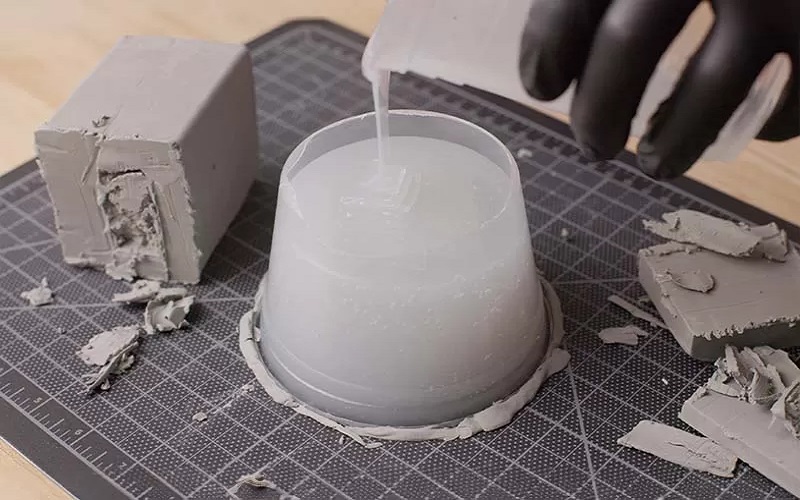
Creating effective silicone molds requires various materials, with 100% silicone caulking being a critical component. A simple DIY recipe involves mixing 2 parts cornstarch, 2 parts silicone caulk, and 1 part mineral spirits. This combination is easy to work with and provides excellent results, allowing for precise mold creation that can be refined with tools like a file for smoothing edges.
Liquid glycerin adds moisture to the silicone, ensuring proper drying, while mineral spirits are used to thin out the silicone, making it easier to work with and ensuring a smooth finish. The weight of the materials must be carefully measured to maintain the correct ratios for optimal mold performance. For those looking for a ready-made solution, products like Smooth-On OOMOO 30 are specifically designed for mold making and can simplify the process.
Disposable plastic cups are ideal for mixing since cured silicone doesn’t stick to plastic, simplifying cleanup. Additionally, a non-porous container, such as coated MDF or a plastic box, is essential for creating a suitable housing for your silicone mold. Keeping a log of mixing ratios and curing times can help track your process for consistent results.
Measuring and Mixing Silicone rubber
Ensuring correct mix ratios is vital for proper silicone curing and achieving the desired consistency and quality. A common mix ratio involves combining:
- 1 ounce of silicone caulk
- 30 drops of glycerin
- 10 drops of paint
- 5 ounces of mineral spirits
This mixture should be blended thoroughly and careful to avoid streaks and uncured areas in the finished mixed epoxy fill mold.
Start by:
- Measuring your silicone caulk into a plastic cup; typically, 1 ounce is recommended.
- Adding the glycerin, paint, and mineral spirits in the specified amounts.
- Mixing slowly to prevent air bubbles from forming.
Using plastic silverware can be helpful for mixing silicone caulking.
Thoroughly mixing ensures even distribution of all components. This step is critical for achieving a smooth and durable silicone mold that will faithfully replicate the details of your model.
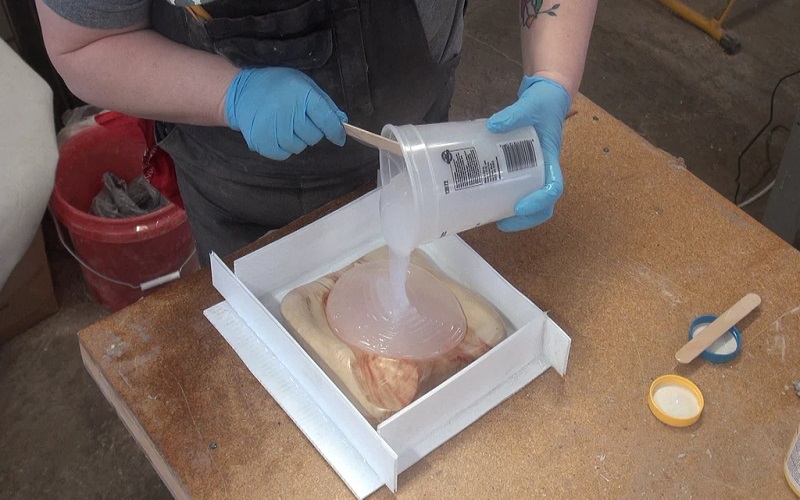
Preparing Your Casting Box
Preparing a casting box properly is crucial for successful silicone mold making. Use a non-porous container to house your silicone mold, as it will prevent the silicone from sticking and ensure a smooth demolding process. Mold release agents facilitate the easy removal of the finished mold from the casting box and the model.
Before pouring the silicone, apply a layer of mold release agent to the inside of the casting box and the master cast pattern. This reduces wear and improves the demolding process, especially for multiple uses, by preventing the silicone from adhering to the casting stuff like the container or model surfaces.
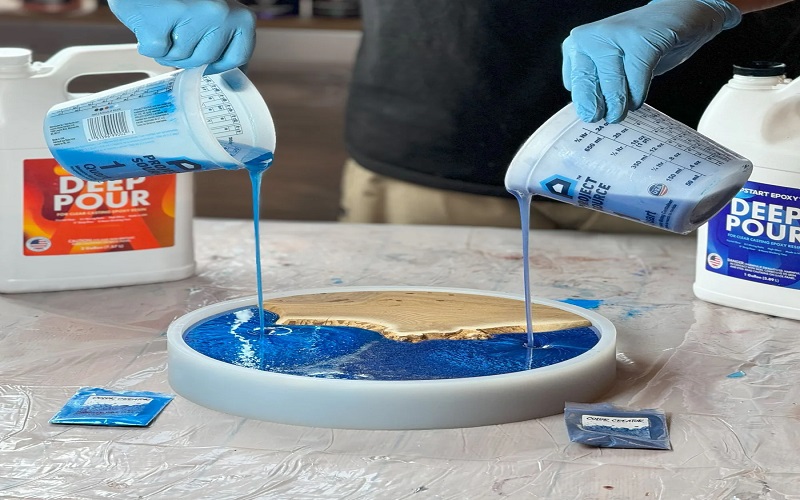
Pouring and Setting the Silicone
Pouring silicone requires patience and technique. Follow these steps:
- Pour silicone slowly and from a height to prevent air bubbles, creating a thin stream.
- This method allows the silicone to flow over the model’s surface smoothly.
- Reduces the risk of trapped air.
A fine brush can eliminate bubbles on the model’s surface during the initial silicone application. Additionally, gently applying compressed air can break any surface bubbles that form during the pouring process to remove air bubbles.
These steps ensure a high-quality silicone mold with a smooth finish.
Curing and Demolding
The curing process for silicone mixtures varies with environmental conditions like heat and humidity, typically taking 2 to 4 hours. Higher humidity levels can speed up the curing process. It’s important to allow the silicone to cure properly to avoid distorting the mold during demolding.
Applying a mold release agent before pouring prevents sticking to the container and master pattern, easing demolding. Follow these steps:
- Lightly mist the inside of the casting box with the mold release.
- Lightly mist the master pattern with the mold release.
- Allow the mold release to dry before pouring the silicone.
When it’s time to demold, consider the following:
- Cut the mold along a zigzag pattern to prevent damage to delicate features.
- Avoid demolding too early to prevent ruining the mold structure.
- For polyurethane resins, prompt demolding is necessary due to the heat generated during curing.
Tips for Perfect Results
Perfect silicone mold making results require minimizing air bubbles and ensuring smooth finishes. A vacuum degassing chamber after mixing can extract trapped air, enhancing mold quality. For DIY enthusiasts, a vacuum chamber can be created using modified paint tanks, providing a cost-effective solution.
Pressure pots force air bubbles into solution, particularly effective for quick-setting silicone materials. Pouring silicone from a height into the mold frame can help pop larger bubbles during the pour itself, improving the pull strength of the final mold for easy demolding.
These techniques ensure high-quality silicone molds with fine details and smooth surfaces, providing soft precision in every aspect. Silicones, especially those from top brands like Smooth-On, enhance the durability and flexibility of these molds, making them trusted by professionals and hobbyists across the world.
Advanced Techniques: Creating Complex Molds
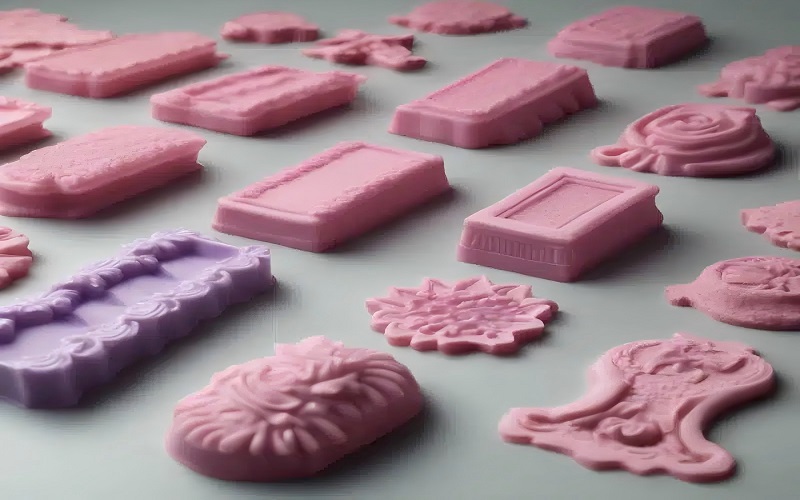
Due to its versatility and adaptability, silicone mold making is essential across industries like prototyping, jewelry making, and food preparation. One of the key advantages of silicone molds is their ability to capture intricate details, making them suitable for complex designs.
When creating molds, consider the following forms:
- One-piece molds are simpler and ideal for designs with flat surfaces.
- Two-piece molds are better for complex shapes.
- Properly aligning the two mold half prevents seams that affect the product’s quality.
Embedding gauze during mold creation enhances tear resistance and improves durability. Casting under pressure can reveal imperfections, so degassing silicone beforehand is crucial.
Common Mistakes and How to Avoid Them
Common mistakes in silicone mold making can hinder your success, but they are easily avoidable with the right knowledge. Using materials at low temperatures can prolong curing times or prevent curing altogether, so ensure your working environment is adequately warm.
Failing to apply the correct release agents can cause the mold to bond permanently to the models, ruining both. Using appropriate release agents ensures a smooth demolding process and preserves your work’s integrity.
Maintenance and Storage of Silicone Molds
Maintaining and storing silicone molds properly ensures their longevity. Clean silicone molds regularly with mild soap and water to prevent dust and lint embedding. Store silicone molds in a cool, shaded area to prevent aging and yellowing from sunlight.
Store different types of silicone molds separately to avoid harmful interactions. Reusing contaminated tools or materials can transfer inhibitors affecting the difference in cures in compatible silicone molds, so avoid a dip in quality.
Avoid excessive stretching of silicone molds to prevent tearing and extend their lifespan.

Summary
In summary, making your own silicone molds is a rewarding and versatile skill that opens up endless possibilities for DIY projects. By understanding the essential materials, mastering the mixing and curing processes, and following expert tips, you can create high-quality silicone molds with ease.
Remember, the key to success lies in careful preparation, precise measurements, and attention to detail. With the knowledge gained from this guide, you’re well-equipped to embark on your silicone mold-making journey and bring your creative ideas to life.
Frequently Asked Questions
What materials do I need for silicone mold making?
To create silicone molds, gather 100% silicone caulking, liquid glycerin, mineral spirits, disposable plastic cups, and a non-porous container. Optional items like Smooth-On OOMOO 30 and mold release agents can enhance your results!
How can I minimize air bubbles in my silicone molds?
To minimize air bubbles in your silicone molds, pour slowly from a height, use a fine brush to remove any surface bubbles, and consider investing in a vacuum chamber or pressure pot to extract trapped air. These simple steps will help ensure a flawless final product!
What are the curing times for silicone molds?
Silicone molds typically cure in 2 to 4 hours, and you can speed up the process in higher humidity. So, keep an eye on those conditions to achieve the best results!
How do I maintain and store silicone molds?
To maintain your silicone molds, clean them with mild soap and water, and store them in a cool, shaded area to keep them in top shape. Remember to avoid excessive stretching and separate different types to prevent any unwanted interactions!
What are common mistakes to avoid in silicone mold making?
To achieve successful silicone mold making, ensure you avoid low temperatures and always use the right release agents. These simple steps will help you prevent unwanted bonding and create quality molds!